Setting up SUSHI Harvesting in Alma
Revised March 2026
Setting up the COUNTER API (aka "SUSHI harvesting") in Alma will automatically load COUNTER compliant statistics from available vendors into Alma Analytics for reporting purposes. See below for the steps to get this process implemented in your local Alma instance.
Page Contents:
- Alma roles
- Setting up a SUSHI subscriber
- Adding and testing SUSHI accounts
- Harvesting usage data
- Running reports via Alma Analytics
Alma Roles
Staff require at least the first three roles for the majority of work setting up SUSHI. The General System Administrator role tasks are minimal and can be accomplished by someone with that role at an institution if the staff member in charge of SUSHI set up does not have that role.
- Acquisitions Administrator - Configure COUNTER subscribers and activate, deactivate, or manually run the automatic harvesting job.
- Vendor Manager - View usage data related to a particular vendor, manually harvest data for the vendor, manually upload data for the vendor, and manage any uploaded data files.
- Usage Data Operator - Manually upload or delete data for any vendor, manage the uploaded data files, and view missing COUNTER data.
- General System Administrator - Activate, deactivate, schedule, or monitor the automatic harvesting job, view the job's history, report, and events, and configure email notifications for the job.
Setting up a SUSHI Subscriber
Typically an institution needs one SUSHI subscriber.
Set this up in Configuration Menu > Acquisitions > General > Subscribers
- Click Add Row.
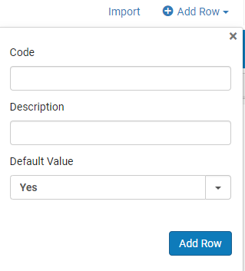
- Enter Code (Select your institutions 3-letter I-Share Code, or some other code of your choosing).
- Enter a Description.
- Leave Default Value Yes.
- Click Add Row.
- Once the subscriber Code is added, it will be listed in the Code Table.
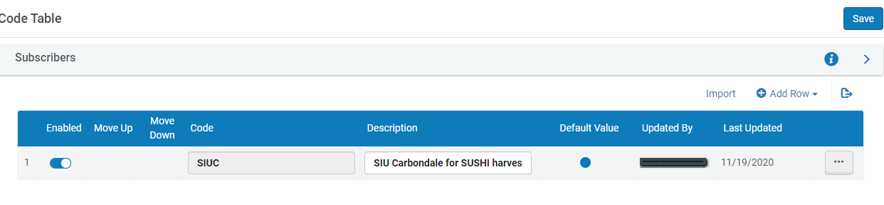
- Click Save.
Adding SUSHI accounts on vendor records and testing SUSHI connections
Vendor Records
You must have a vendor record in Alma to set up SUSHI harvesting for that vendor.
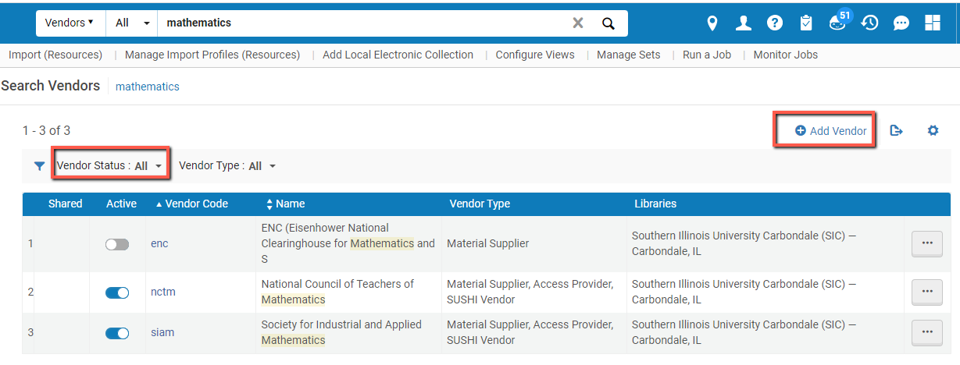
- Search Alma Vendors with vendor status = All.
- If no vendor exists, click on Add vendor and create a new vendor for the publisher/platform.
- If no vendor exists, click on Add vendor and create a new vendor for the publisher/platform.
- Once you have a vendor added, or an existing vendor is found, click the Vendor Code, or "More Actions" ellipsis to Edit the vendor.
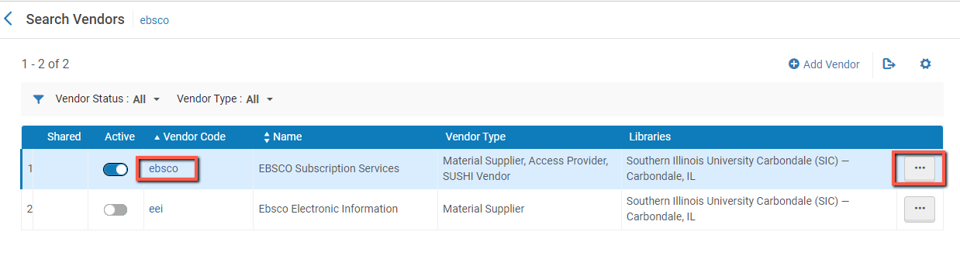
- Click on the Usage Data Tab.
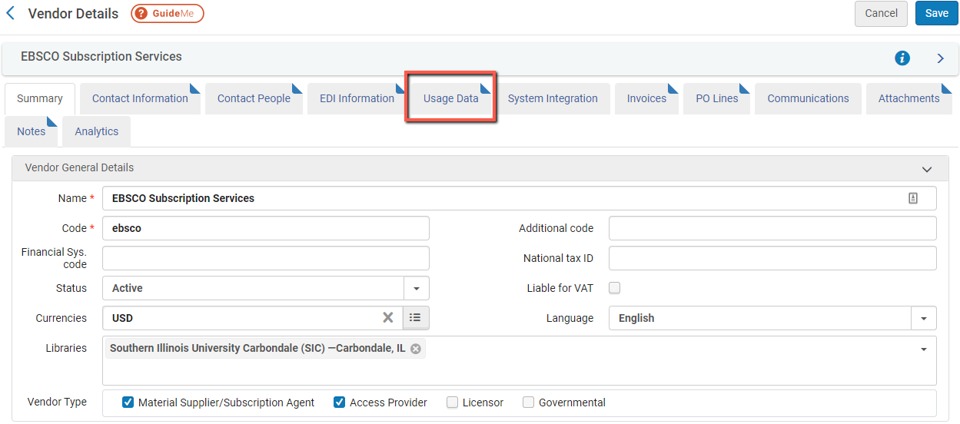
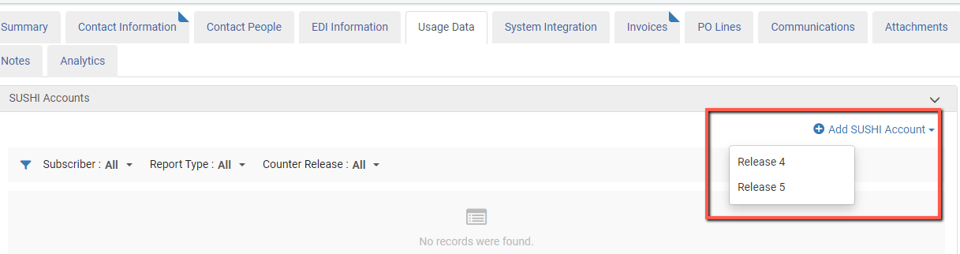
Usage Data Tab
- Click on Add SUSHI Account.
- Select Release 4, 5, or 5.1 as appropriate
- Note: COUNTER Release 5.1 is the current standard. See the COUNTER Registry for the most up-to-date list of COUNTER-compliant platforms.
- Note: COUNTER Release 5.1 is the current standard. See the COUNTER Registry for the most up-to-date list of COUNTER-compliant platforms.
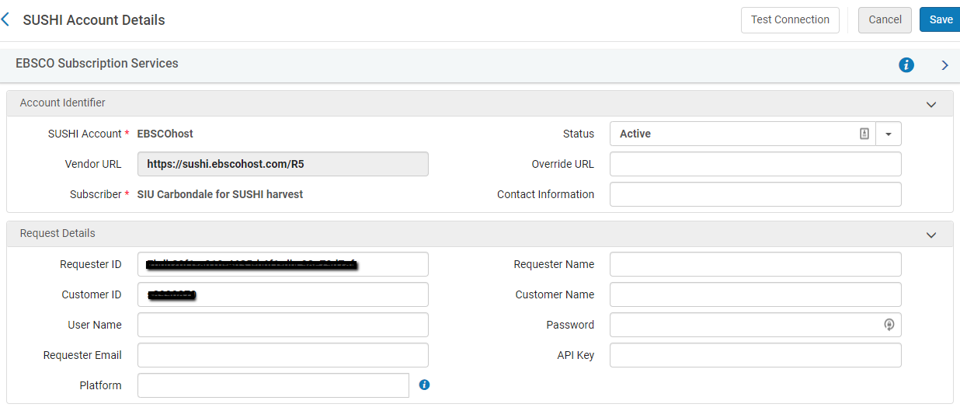
- In the "Account Identifier" box, search for the appropriate vendor or platform name. Once selected, Alma will populate the "Vendor URL" field with the appropriate URL.
- Copy and paste SUSHI credential information from the vendor's website into the appropriate fields in the "Request Details" box as pictured below.
- Required fields vary by vendor/platform and can be found in the COUNTER Registry. Most often used fields are: Requester ID, Customer ID, and many also require an API Key.
- Information about required fields for CARLI-brokered vendors are noted in Agreement information in ConsortiaManager.
- Do not fill out fields not required by the vendor/platform.
- Required fields vary by vendor/platform and can be found in the COUNTER Registry. Most often used fields are: Requester ID, Customer ID, and many also require an API Key.
- Once you have entered your SUSHI Connection details, click Test Connection. This will verify your connection details are correct.
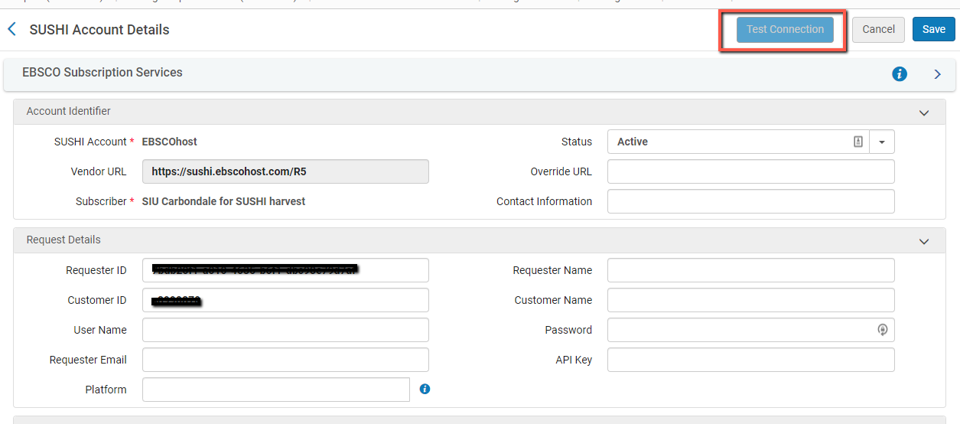
Test Connection
After clicking the Test Connection button, a JSON file is created for download. This file can be opened with a text editor or internet browser.
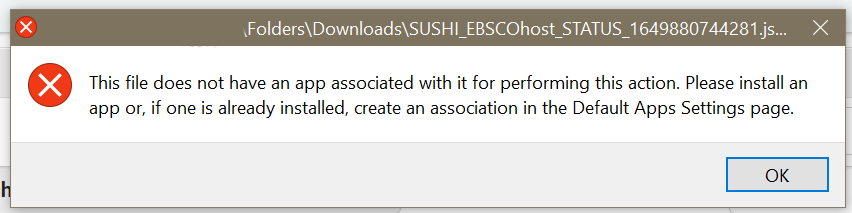
If you have never opened a JSON file and attempt to open it with Chrome, you may receive an error stating "This file does not have an app associated with it for performing this action. Please install an app or, if one is already installed, create an association in the Default Apps Settings page."
To open the file, open your text editor of choice and choose Open, then navigate to the file to Open it. You may want to associate the JSON file with a text editor to avoid this message in the future.
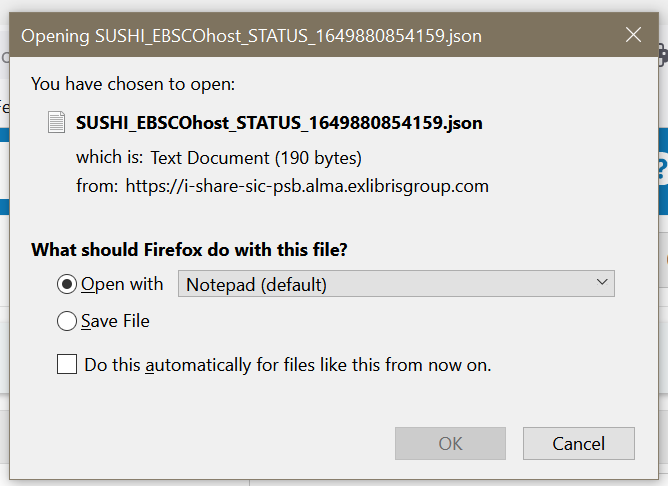
If you use Firefox, it may offer to open the file in a text editor automatically:
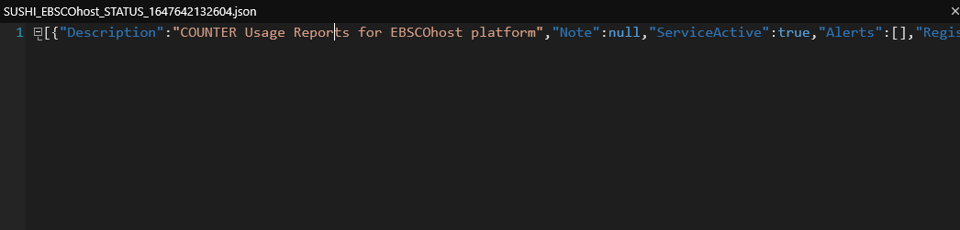
Successful Test
If your SUSHI Connection Test is successful, you should receive a message that includes a "Service_Active":true statement.
Failed Test
If the SUSHI connection test fails, you may see various errors in the JSON file (see below) or the error may pop-up directly in the Alma interface. These errors can be investigated further via Ex Libris documentation on troubleshooting COUNTER 5 SUSHI Harvesting.

Select the Types of Reports to Harvest
Once you have verified your SUSHI Connection is working, you can add the types of reports you wish to harvest. Note that not all vendors will have all report types. If you are not sure which Reports to select the Managing COUNTER-compliant Usage Data page from Ex Libris describes each report type. The COUNTER Registry also lists which reports are valid for each COUNTER-compliant platform.
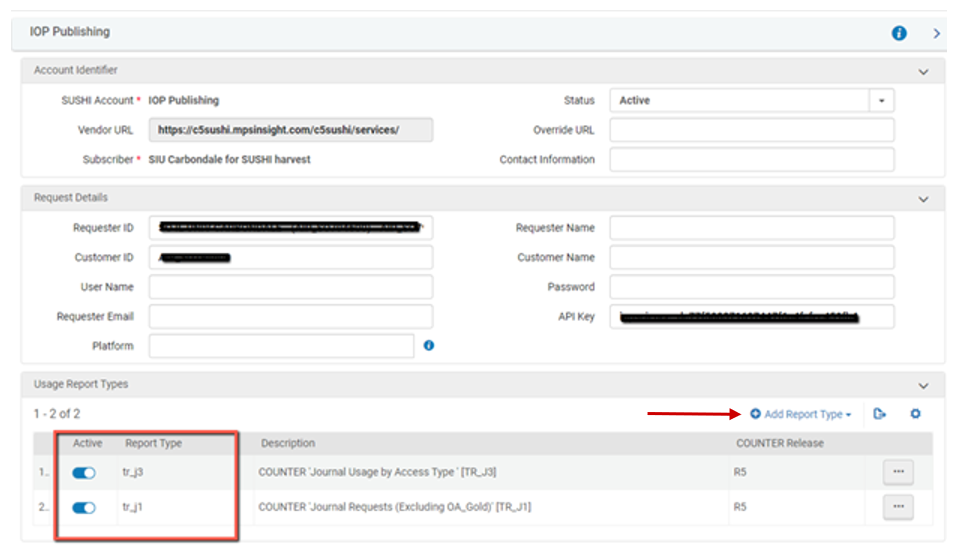
Click Add Report Type and the Reports Type Selection Box will open.
Select the Reports you want to harvest, and they will appear on the list of Active Reports.
Once you have selected all the reports, Click to Save the information at the top of SUSHI Account Details Page. This will return you to the Vendor Details Usage Data Tab. Click Save to save all changes.
Harvesting usage data
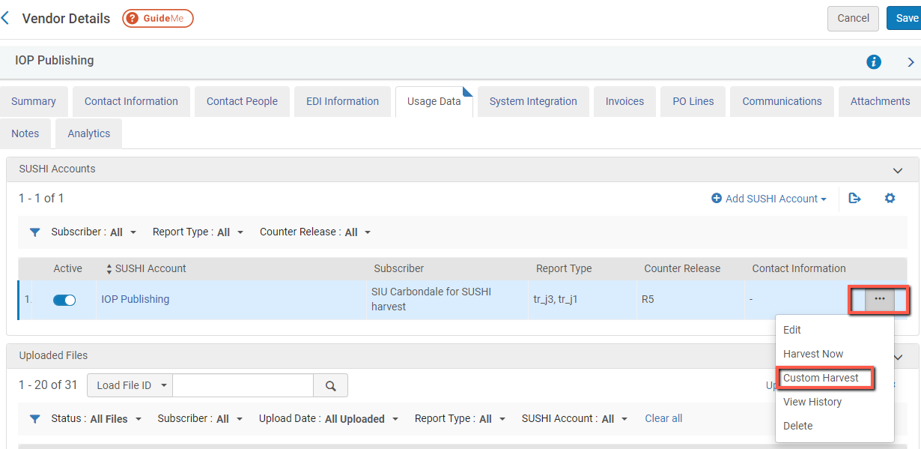
Return to the Vendor Details Usage Data Tab and in Row Actions select Custom Harvest > enter desired date range to harvest data.
What data to harvest is a local decision: you may decide you want all COUNTER 5 data your vendor has available, or perhaps all data since a particular date. Note: The Harvest Now option will only harvest most recent 12 months.
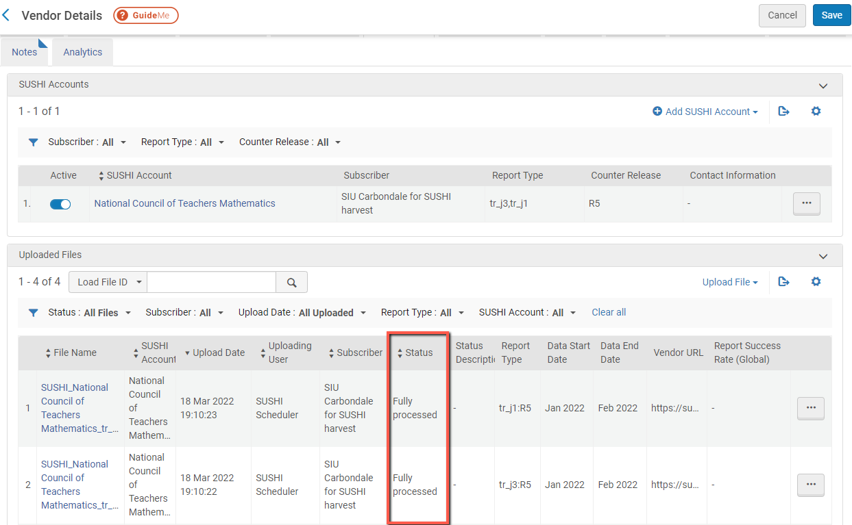
Once you do the custom harvest, you can verify the data has been harvested. Look under Vendor Details > Usage Data and see the uploaded files section.
After the first harvest, Alma will continue capturing data based on your schedule, based on recent month (only newest data is retrieved after first harvest).
To set up the automated schedule:
- Go to Configuration Menu > Acquisitions > General > Acquisition Jobs Configuration
- Set Status to Active.
- Select from 5 available Scheduling options. Recommended: Select one of the monthly options.
- Set up email notifications to receive job reports in your mailbox. Recommended so you will be aware if there are any issues.

Check job reports
If set up in Configuration as recommended above, job reports are emailed with the Subject “SUSHI harvesting job - Completed with Errors."
Reports are also available via Alma > Admin > Manage jobs and sets > Monitor jobs > Scheduled > SUSHI harvesting job > job history from row actions
Check errors that may require you to fix problems, see common error messages and recommended actions.
Review Ex Libris' Troubleshooting Tips for COUNTER 5 SUSHI Harvesting for more complex SUSHI problems.
Running reports via Alma Analytics
Usage data loaded into Alma will be available via Alma Analytics by the beginning of the following work day.
If you are new to Analytics, CARLI recommends the Ex Libris training series "Alma Analytics: Become an Expert." Session 3 includes information specific to Electronic Inventory and Usage Statistics.
Roles Required for Analytics:
- Design Analytics
- Analytics Administrator, or
- General System Administrator
The following reports have been shared by members of CARLI's E-Resources Management Committee and can be found in Alma Analytics under Shared Folders > Carli NETWORK 01CARLI_NETWORK > E-Resource Usage Reports. You may also find additional useful reports for your library by searching the Shared Folders. When using shared reports, make sure to follow the instructions to copy the reports to your institutions folder for further customization.
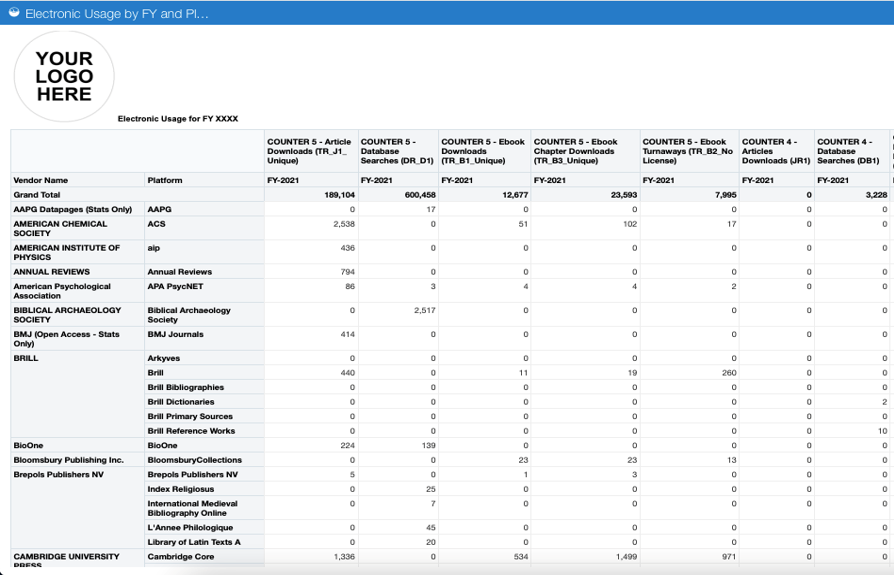
Electronic Usage by FY and Platform – COUNTER 4 and 5
This report total usage by Fiscal Year and Platform for each type of COUNTER statistic you may be harvesting.
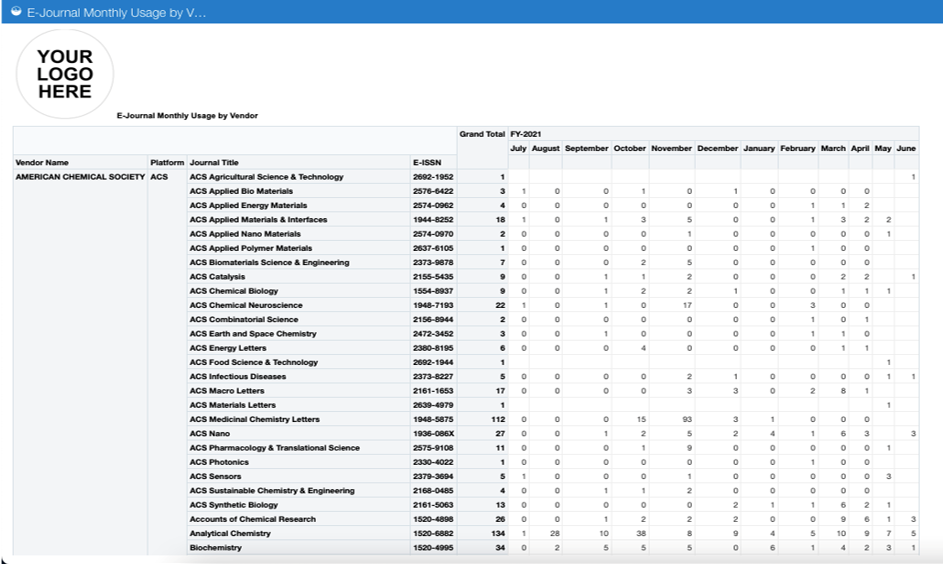
Electronic Usage by Month and Platform – COUNTER 4 and 5
This report lists the usage statistics for individual titles in packages by platform and month.
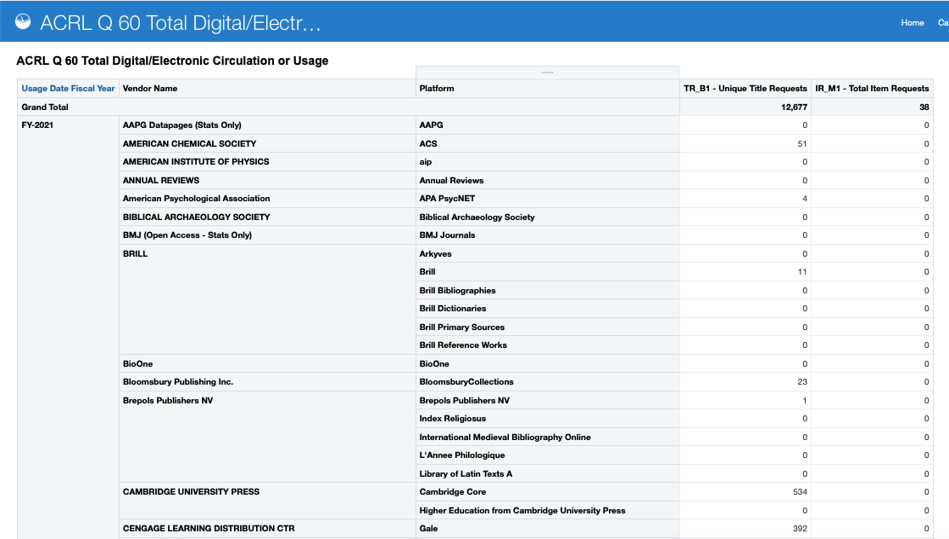
ACRL Q60 Total Digital/Electronic Collection Circulation or Usage
Gathers and totals statistics to answer ACRL question 60, total Digital/Electronic collection circulation or Usage by FY.
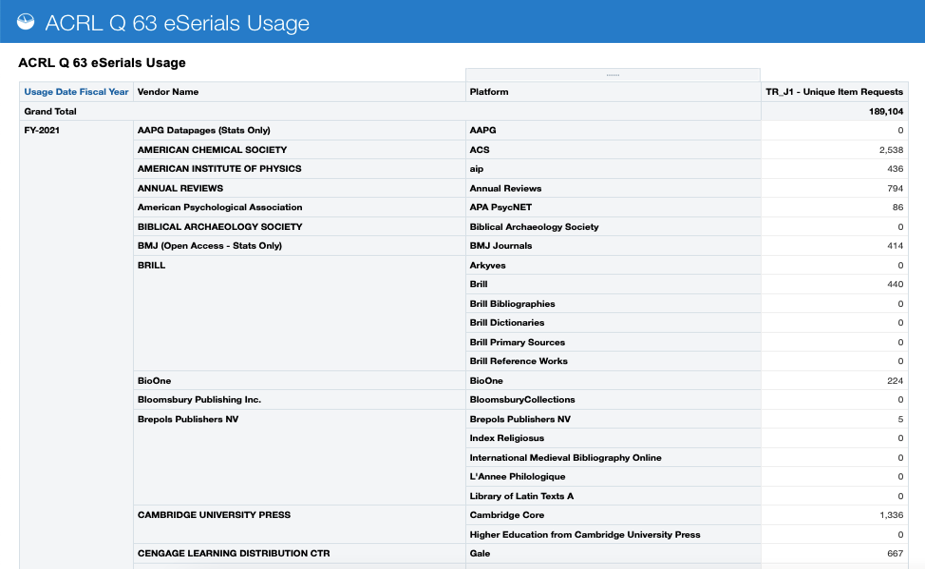
ACRL Q63 e-Serials Usage
Gathers and totals statistics to answer ACRL question 63, total e-serials usage by FY.
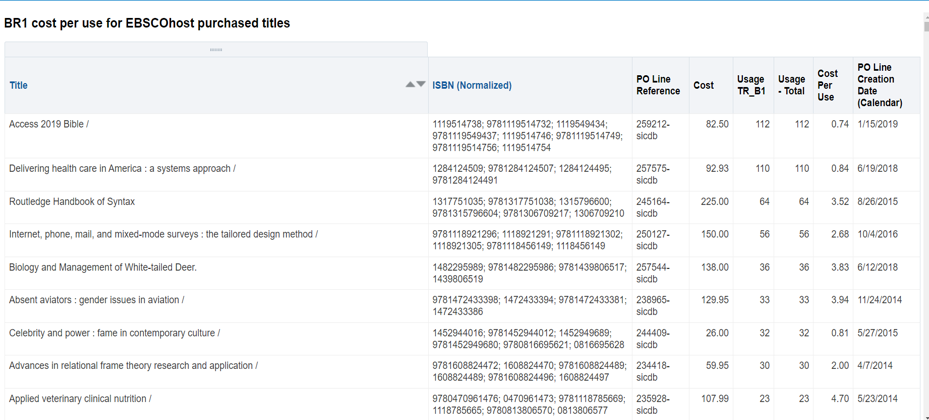
Cost Per Use for eBooks
Based on individually purchased titles by Collection, this Analytic should be edited to include the Electronic Collection you are interested in reporting on. Note: A library must have POLs for the individual titles for this Analytic to work properly.
If your institution has developed Analytic reports using COUNTER data, please feel free to share them by emailing CARLI Support.