Primo VE Common Customizations
Revised: May 9, 2023
On this page, you'll find an overview of some common Primo VE customizations that I-Share libraries may wish to make.
Contents:
- Adding new links to the Links Menu
- Configuring the "Cards" on the Primo VE main page
- Changing labels
- Removing "Expand my results" option from results page
- Changing the favicon that appears in the browser tab
- Changing the page title that appears in the browser tab
- Removing RefWorks as an option in the menu
Adding new links to the Links Menu

The top tabs on the main Primo VE page may be changed to suit your library's needs. Links can be found under Alma Configuration > Discovery > Configure views. The view name should be called "01CARLI_XXX:CARLI_XXX" where XXX is your three-letter library code. Click on the ellipsis at the right of the row with your view name and choose "Edit." From the Edit page, click the Links Menu tab. Links may be reordered, new links added or deleted, etc. from that page. To add a new link, follow the ExLibris directions.
Adding a Course Reserves link to the Links Menu
To specifically add a Course Reserves link to your main Primo VE page, navigate to the Links Menu tab in the view as described above. Add the code and label that you wish to use for your Course Reserves. For the URL, input the following:
https://i-share-xxx.primo.exlibrisgroup.com/discovery/search?vid=01CARLI_XXX%3ACARLI_XXX&search_scope=CourseReserves
The lowercase red xxx will be the the lowercase version if your library's three-letter code and the uppercase XXX will be the uppercase version if your library's three-letter code.
Configuring the "Cards" on the Primo VE main page
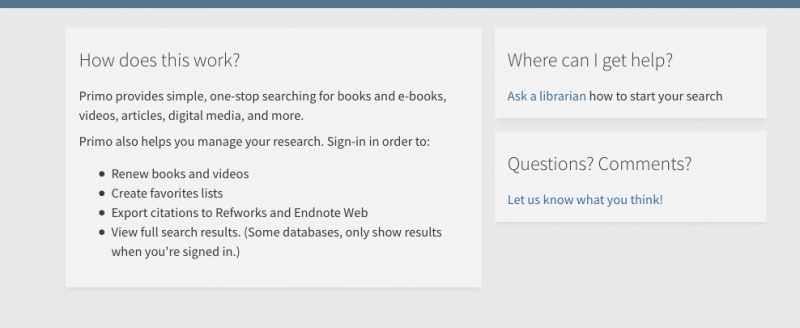
The "cards" on the main Primo VE page may be customized using the Primo VE customization package. They are edited by downloading this customization package to your computer, making edits in the /html/homepage_en.html file, and then re-uploading the package file back into Alma. For an overview of what files are in the Primo VE customization package, please see the Ex Libris documentation.
Specific steps for downloading, editing, zipping, and uploading the customization package.
Changing labels
Find more information on changing labels on the Customizing Primo VE Labels page.
Labels are under Alma Configuration > Discovery > Display Configuration > Labels. Do a search for the name of the label you want to change using the Description option (rather than the default "code" option).
The "GET IT FROM OTHER INSTITUTIONS" section label is "nui.brief.results.tabs.getit_other" in the Alma Configuration > Discovery > Display Configuration > Labels > GetIT! Tab1 Labels
Removing "Expand my results" option from results page
You may wish to remove the "Expand my Results" check box from the results page.
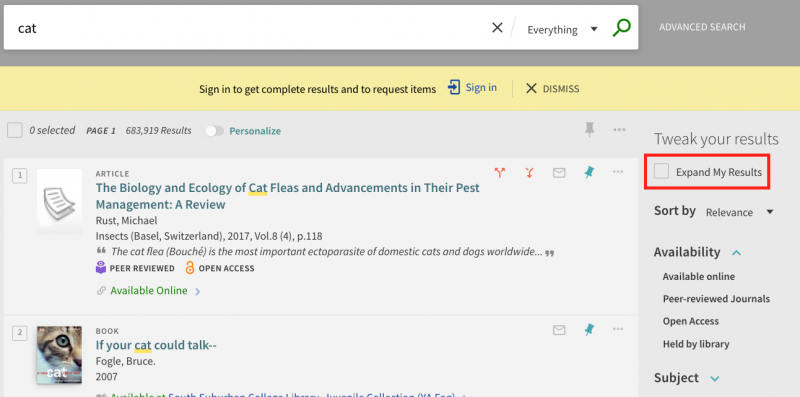
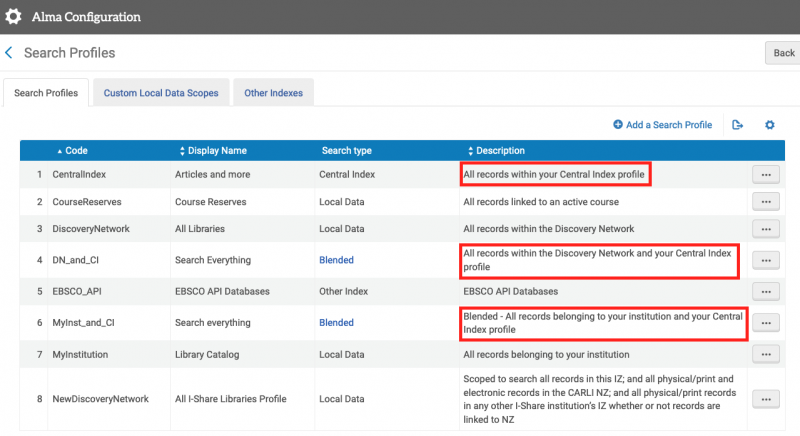
Under Alma Configuration > Discovery > Search Configuration > Search Profiles. Any of the search profiles that have "Central Index" in the description will need to be edited. Click on the ellipsis button to edit the profile, then unchecked the "Filter by Availability" option, and save. If you do decide you'd like the option back on the results page in the future, simply re-check the box and save.
More information can be found on the SUNY Library Consortium Primo VE FAQ: https://slcny.libanswers.com/faq/260026
Changing the favicon that appears in the Browser Tab
You can customize the favicon that appears in the browser tab using the Primo VE Customization Package. For more details, see Manage Customization Package Tab.
Changing the page title that appears in the browser tab
- In Alma Go to Configuration Menu > Discovery > Display Configuration > Labels
- Find the Header/Footer Tiles Labels table and choose Customize from the ellipsis.
- Change the description for the code nui.brief.title from "Ex Libris Discovery - {{query}}" to "Your Preferred Title - {{query}}" (both without the quotes)
- Important: You must keep the "- {{query}}" string as it is in the Description!
- Click Customize button to save the changes.

Removing Refworks as an option in the Menu
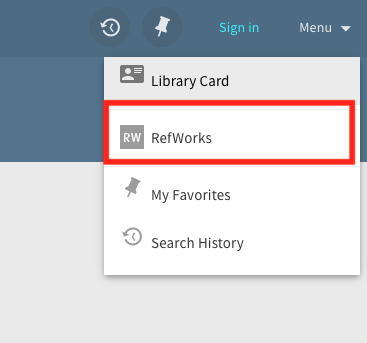
Option 1: If you do not want to offer RefWorks options in Primo VE to your users at all, you can simply deactivate the RefWorks Record Action item on the Brief Record Display tab and that will also hide the RefWorks option in the dropdown menu (pictured above) automatically.
Option 2: If you only want to remove the RefWorks option in the dropdown (pictured above), but you want to continue to provide the Record Action item on the Brief Record Display tab, you will need to edit the CSS file in the View's Customization Package:
The classes to edit are not already in the custom CSS file. You must add code information that Ex Libris provides in their documentation to the custom CSS file, and save it and upload it, then the system will read the code and hide the RefWorks link.
When you open the default custom1.css files it has 18 lines in it, all of which are commented OUT (the /* and */ are the means by which code is commented out in the file). Below any existing code, add in the code from the Ex Libris documentation:
/* The following two entries hide the RefWorks link in the Primo VE dropdown menu */

.my-refworks-ctm {
display: none;
}

.my-refworks-separator-ctm {
display: none;
}
Then save the custom1.css file, zip the folder up, and upload the new customization package to Alma.