Customizing Primo VE Labels
Revised: October 28, 2024
Background
Most labels in Primo VE that display on the Brief Results areas, Full Display page, different Services sections, and My Library Card pages are customizable by your institution. There are many common labels that other I-Share libraries have changed. Examples of those labels can be found on this page.
Ex Libris documentation page: Configuring Display Labels for Primo VE
Customize Labels and Headings in Primo VE
Alma role needed: Discovery Admin
- First, determine a label's code using common browser inspection tools. See the instructions at the bottom of the page.
- Go to Alma Configuration > Discovery > Display Configuration > Labels. All labels are organized within label Code Tables.
- Find which Code Table contains the label you wish to change.
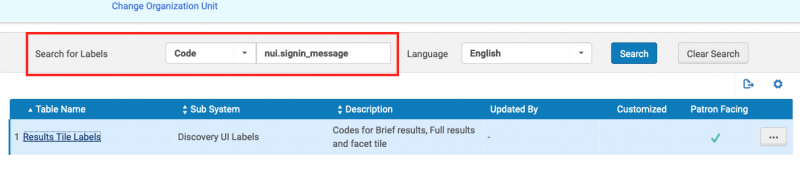
- If you have used the browser (or know the code), use the default "Code" search option to find the label.
- You can also search by Description (e.g. "Get it from other institutions," "Tweak your results") but note many labels have similar codes and descriptions, so be careful that you are editing the correct one.
- Labels are grouped in tables. Once you have searched for the code, you will see the name of the Code Table it is in. You may see more than one label table if you are searching by description. Use the ellipsis button to customize or edit the table.
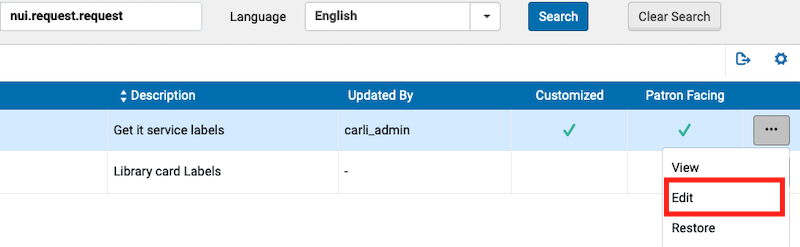
- If it is the first time you are changing a label in that particular table, you will see a "Customize" option.
- If you have edited labels in the table before, you will see an "Edit" option.

- Scroll through the table to find the correct code (or use the Find in page functionality of your browser) and edit the Description for that code to change the text of the label.
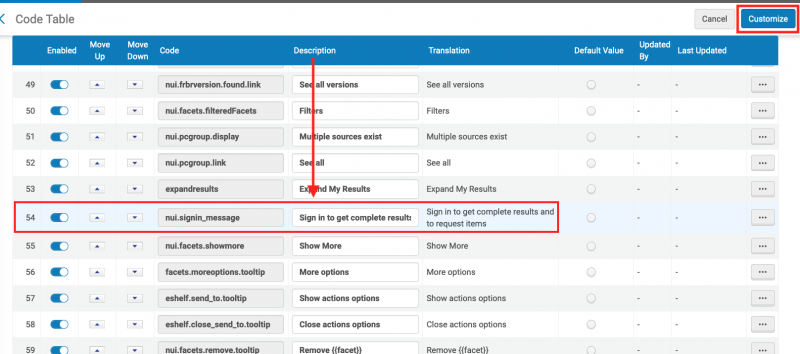
- Once you have edited the Description, click "Customize" or "Save" at the top of the page to save your changes.
Changing a Label for a specific Primo VE View
The default for Primo VE is that changing a label in the Alma labels table will change that label in ALL of your instance's Primo VE views. You can change a label for a specific Primo VE View.
To define a view-specific label:
- Create a new row using the following format for the code: <Institution's Code>:<View's Code>.<Label's Code>
- The system will use the code without the prefix for the default label across the rest of your instance's Views and will use the specific label in the View you indicate.
Examples
01CARLI_MLS:CARLI_MLS.nui.facets.title (for a view-specific label of "Tweak your results")
01CARLI_DPU:CARLI_DPU_TEST.almaRequest.notNeedAfter (for a view-specific label of "Not needed after")
Additional information about labels
- NEW! Some labels now allow HTML coding, including the <href> tag for linking. There is a list of labels that allow HTML support available on the Ex Libris website. This is an on-going enhancement and more labels will be added to this list in the future.
- To return a label to its out-of-the-box setting, select Restore from its row's action list.
- If you do not want to display a code's label in Primo VE, specify NOT_DEFINED for English and all other languages that you support.
- The setting of the Enabled field has no effect on the display of the label.
- Many label description changes are instantaneous and you will see the change right away. Some labels, like facets, may take up to several days to change.
- Note that some things that look like labels are more typically edited in other areas of Alma Configuration rather than a Label table, and may be called "Name" or "Description".
Examples of Labels that I-Share Institutions Have Changed
Browser Tab label
| Label: Default is "Ex Libris Discovery" Code: main.title Table: Header/Footer Tiles Labels |
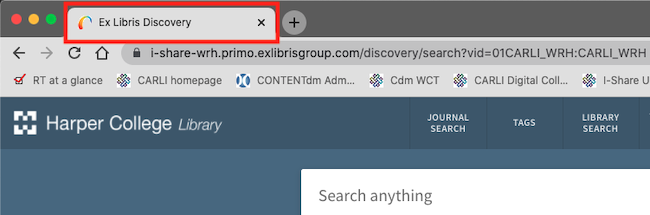 |
This is the NEW label for the browser tab. An update to Primo VE in November 2021 changed this label from the old code: nui.brief.title to the new code: main.title. Any changes made to the old label will no longer display in browser tabs and you must change the main.title label.
Labels on the Full Item Description page, including the Get It section
| Label: Request in the Get It section Code: nui.request.request Table: Get it service labels |
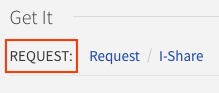 |
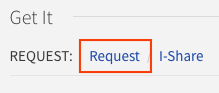
| Label: "Request" link for Local Hold Requests in the Get It section Code: AlmaRequest Table: Request options Labels |
 |
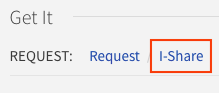
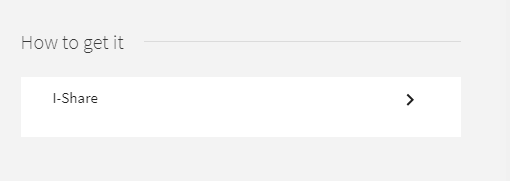
| Label: "I-Share" link for I-Share/AFN requests in the "Get It" section and the "How to get it" section Code: AlmaResourceSharing Table: Request options Labels |
 |
 |
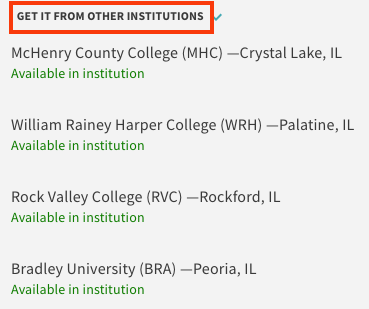
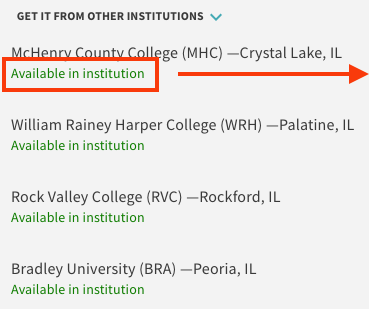
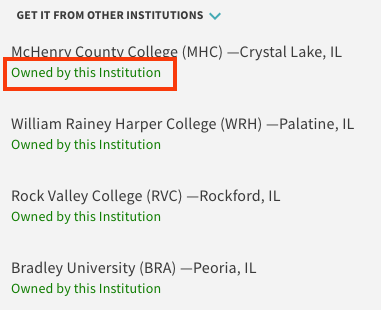
| Label: GET IT FROM OTHER INSTITUTIONS Code: nui.brief.results.tabs.getit_other Table: GetIT! Tab1 Labels |
 |
| Default: | CARLI Recommended Customization: | |
| Label: Green "Available in institution" text beneath Other Institutions holdings in Get It From Other Institutions section Code: fulldisplay.otherMembers.availabilty.available_in_institution Table: Getit Tile Labels |
 |
 |
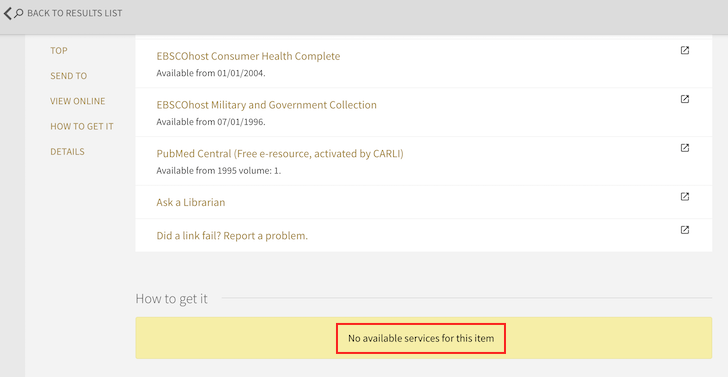
| Label: No available services for this item. Code: brief.results.tabs.Get_it_from_other_locations_no_services Table: GetIT! Tab1 Labels |
 |
Labels on the Local Request Form
| Label:Not needed after Code:almaRequest.notNeedAfter Table:Request Labels Label:Pickup date |
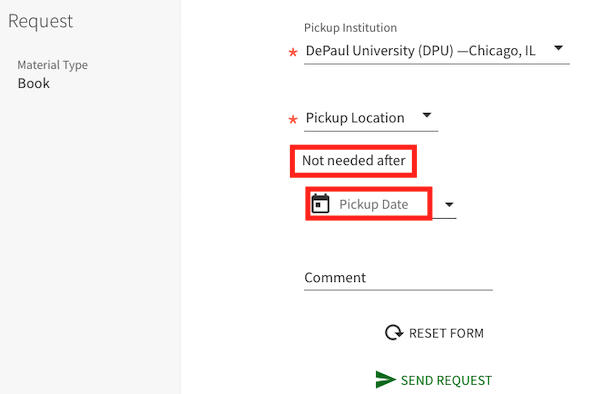 |
You may also remove the Not Needed After/Pick Up Date section of the form completely. Information to remove the section can be found on the Remove the "Not Needed After" Section from the Local Request Form page.
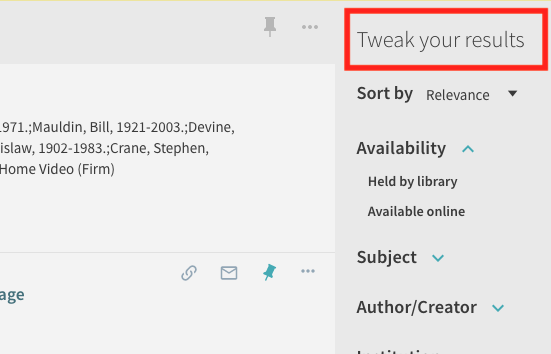
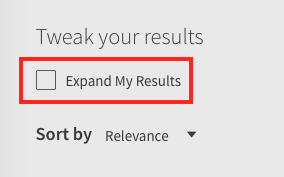
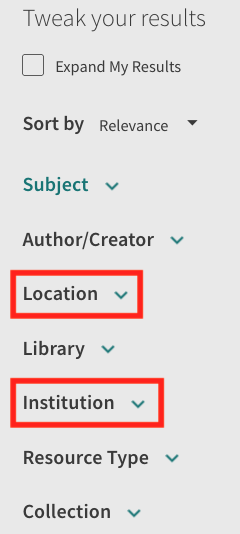
Labels on the Brief Results List, Including Facets
| Label: Tweak Your Results Code: nui.facets.title Table: Results Tile Labels |
 |
| Label: Expand My Results Code: expandresults Table: Results Tile Labels |
 |
| Label: Facets within the Tweak your results sidebar, including "Location" and "Institution" Example codes: facets.facet.facet_location_code (for "Location" facet) or facets.facet.facet_institution (for "Institution" facet) Table: Facet Labels |
 |
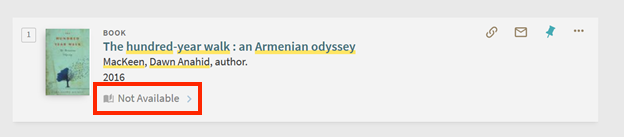
| Label: Not Available Code: delivery.code.unavailable Table: Calculated Availability Text Labels |
 |
How to Determine a Label's Code Using Your Web Browser
Since many labels have similar codes, you can use your web browser's developer tools to determine what the label code of any Primo VE label is. This makes it easier to find in the Alma Labels table and helps you know exactly what label you are changing
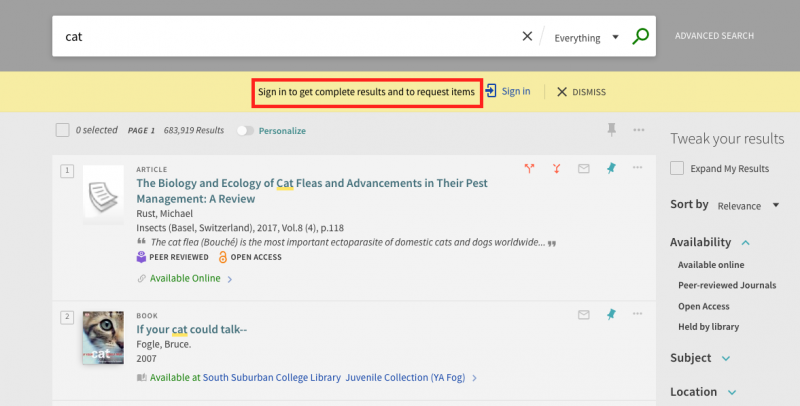
In this example, we are using the web browser to find the label for the "Sign in to get complete results and to request items" banner text.
- Once the targeted label is displayed in the web browser, open the inspector tool.
- In Firefox, the inspector tool can be found under Tools > Web Developer > Inspector.
- In Chrome, it can be found under More tools > Developer tools on Windows 10, or View > Developer > Inspect Elements on Mac.
- With the inspector tool open, mouse over the label to highlight it, so you are sure you have the correct label.
- Click on the label text. The relevant label code is highlighted in the web console. The "translate" information is the Code for that element of the page.

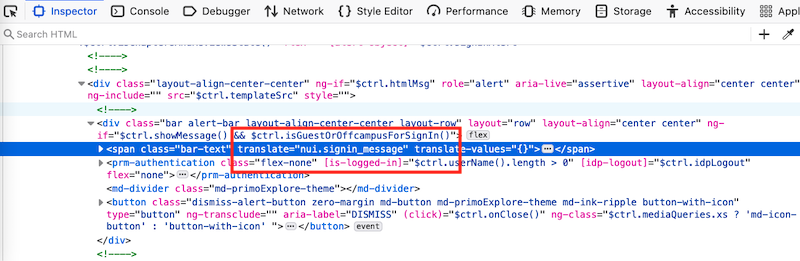
- Use the Code to search for the label in Alma Configuration > Discovery > Display Configuration > Labels. Be sure to "Search for Labels" by Code.
If you have any questions or experience any problems customizing labels, contact CARLI Support.