Setting Up a Developer Network Account
Visitors, please note these are instructions for library staff at CARLI member institutions. Ex Libris customers who are not at a CARLI member library should contact your local consortium or Ex Libris Support for assistance.
Ex Libris Developer Network accounts are assigned to individuals via email address, but each individual must be invited into their host institution in order to have access to production Alma data. Library staff at I-Share libraries should contact CARLI to request an invitation. The invitation launches a multiple step process to create an account, confirm the account, and then accept the invitation, then confirm access.
CARLI typically assigns accounts to the institution's I-Share liaison and/or technical contact. Consider whether someone at your institution already has the appropriate level of access before requesting an account.
Part 1. Contact CARLI to Request a Developer Network Invitation
- Contact CARLI using support@carli.illinois.edu and request a Developer Network account for your institution. CARLI staff will sign in to the Developer Network and create an invitation.
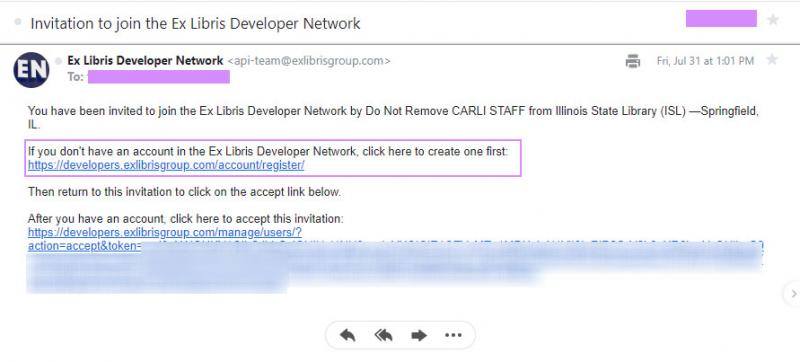
- You will receive an email with the subject, Invitation to join the Ex Libris Developer Network. Open this message.
- The message will contain two URLs. If you have not previously created a Developer Network Account, click the first link in the message, which goes to https://developers.exlibrisgroup.com/account/register/.
- Your browser will open to the Developer Network user registration page. When registering your account, you will need to enter your institution name as it appears in your Alma instance. Typically this is something like the following (Note that there is an em dash before the city name; you may substitute two hyphens for that character): I-Share University (XXX) —Champaign, IL

- Be sure to check the box that indicates you have read and agree to the Terms of Use and Privacy Policy, then click Register.
Part 2. Activate Your New Account
- After you save your new account, the Developer Network will identify if your email address has already been used to create an account, or if your registration was successful. Successful registration identifies that an activation email has been sent to your email address.

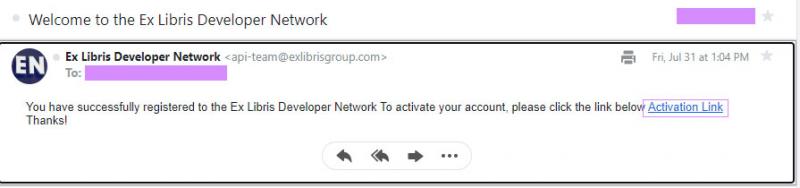
- Check your email inbox for a message with the subject, Welcome to the Ex Libris Developer Network. Open this message.
- Click the Activation Link in that message. This link contains a secure key associated with the account you registered and the email you used for registration.
- On clicking the activation link, your browser will open a tab or window to the Developer Network's login screen. On successful activation, you will see a message that "Your account has been activated." You will also receive an email from the Developer Network with the subject, Account has been activated.

Part 3. Accept Invitation to the Institution
- Now that your account is activated, login to the Developer Network at the Login screen above, which is found at https://developers.exlibrisgroup.com/login/.
- In your email inbox, return to the message with the subject, Invitation to join the Ex Libris Developer Network. Open this message.
- In the message, locate the second URL, following the text, "After you have an account, click here to accept this invitation:"
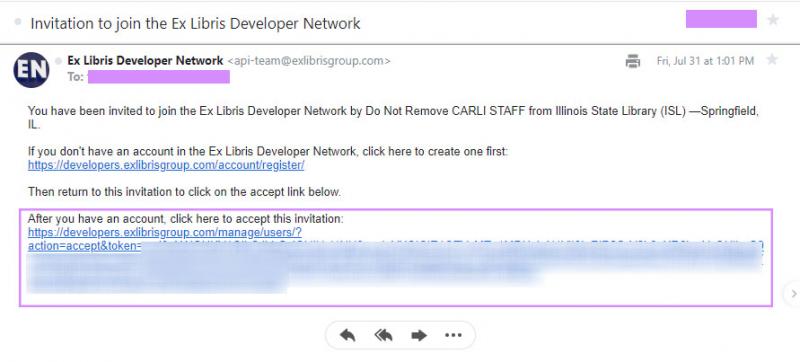
- This link should associate your new account with the invitation, and give you permissions for your production environment.
Part 4. Confirm Your Access Permissions
- To confirm that your account has been given production access, click the Build APIs link at the top of the screen.
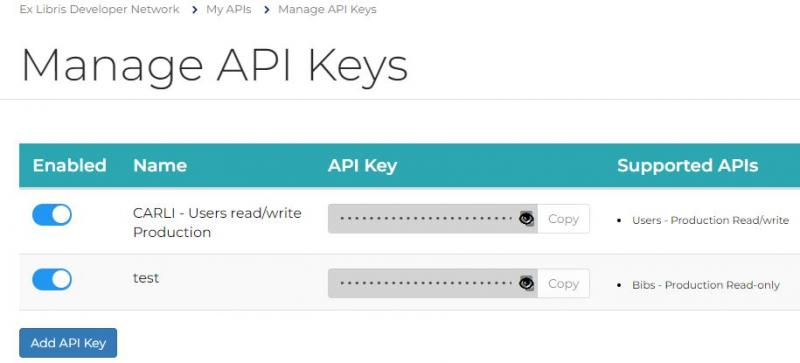
- Click Manage Keys. Note: Only users who have requested the ability to send invites to others at their library will see the Manage Users option on the Build My APIs screen.
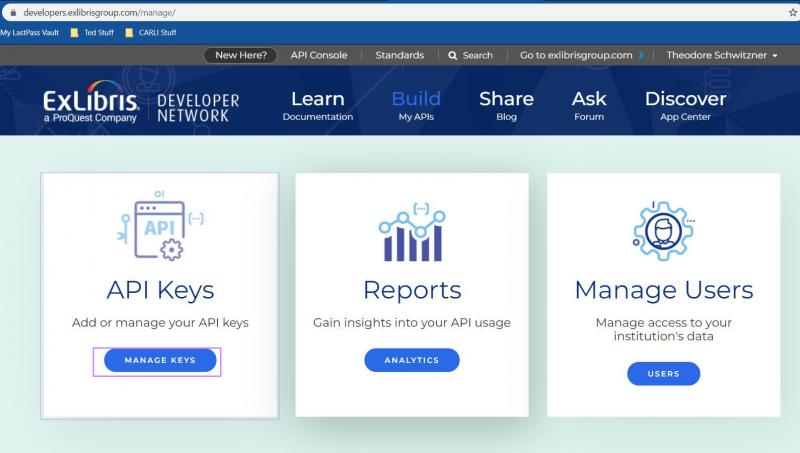
- On the API Keys screen, click Add API Key.
- Click Add Permission.

- Look in the list of options under the ENV column heading. If "Production" is listed, your account has been successfully connected to your production environment.
- You may cancel creating the API at this point, or continue to create the key that you need.