Primo VE Customization Package: Shared CSS and JavaScript Solutions
Revised: July 18, 2023
Background
Each View created for Primo VE can be customized with a Customization Package. The Customization Package allows for both simple customizations like logos, colors, and the homepage HTML cards, and for more advanced customizations like custom CSS and JavaScript code. The Shared Customization Code section of this page links to pages with CSS and JavaScript code customizations that I-Share institutions may wish to implement in their own Primo VE Views.
If you have questions or need assistance implementing these solutions, or have CSS/JavaScript customizations to share with other institutions, please contact CARLI Support.
Tips and Tricks
- CARLI recommends watching the "Primo VE - Configuring the User Interface" video series (6 videos, 23 minutes total) for more information about making customizations.
- To edit Primo VE Customization Packages, you must have the Alma Role: Discovery Admin
- Primo VE Customization Packages are edited in: Alma Configuration > Discovery > Configure views > choose the "Edit" option under the ... menu for the View Code you wish to edit > Manage Customization Package tab
- CARLI strongly recommends that you experiment with CSS and JavaScript customizations first on a TEST VIEW to make sure that they work correctly before implementing changes to your current production View.
- You can "Duplicate" your current View from the Views List (click the ... button and choose Duplicate) to create a Test View that can be deleted when you are done.
- Always make a back-up of the CURRENT Customization Package in use by the View in case you make a mistake or need to go back to the currently working package.
- Multiple CSS and JavaScript customizations may be applied to a single Primo VE View. Your institution may have local customizations that you have created. All customizations will coexist in the same Customization Package configuration files, either custom1.css or custom.js, depending on if they involve CSS or JavaScript code, respectively.
- Help yourself and your colleagues by leaving clear comments in the files that explain what the additions do, who added them, and the date. Comments are made by putting the text between /* and */ markers. For example:
/* This collapses "Get It From Other Institutions" dropdown by default in full record. GJC 12/15/2020 */
Working with the Customization Package
Here is a basic overview of how to work with a Customization Package:
- Navigate to Alma Configuration > Discovery > Display Configuration > Configure Views > ellipsis to Edit the View > Manage Customization Package tab
- Download the Customization Package .zip file from the Manage Customization Package Tab. The file will download as something like 01CARLI_XXX-VIEWCODE.zip depending on the View Code.
- If the customization package for the View has been edited before, the Download button for the "Current View Customization Package" is available, and you should download this current package to maintain all of the customizations that have already been made.
- If the customization package for the View has never been edited before, Download the "Template View Customization Package" and rename the folder within the .zip file to the appropriate view name. If you are keeping the name as the current view (i.e. editing the default view rather than creating a new one), the name will be: 01CARLI_XXX-VIEWCODE (where XXX is your three-letter I-Share code in UPPERCASE, and the VIEWCODE by default is CARLI_XXX).
- Once a customization package has been uploaded once for the View, the Download button for "Current View Customization Package" will then become available and should be used the next time you edit your Customization Package in order to maintain all current customizations.
- Unzip the .zip file to your PC. For example, EIU's Customization Package .zip file in step 2 above would unzip to a folder named 01CARLI_EIU-VIEWCODE (for example, the folder for EIU by default would be named 01CARLI_EIU-CARLI_EIU).
- Make changes to its contents, either manually or through Primo Studio where possible, and save the changes to the file of the Customization Package on your PC.
- The solutions on this page require editing the /01CARLI_XXX-VIEWCODE/css/custom1.css and/or the /01CARLI_XXX-VIEWCODE/js/custom.js files.
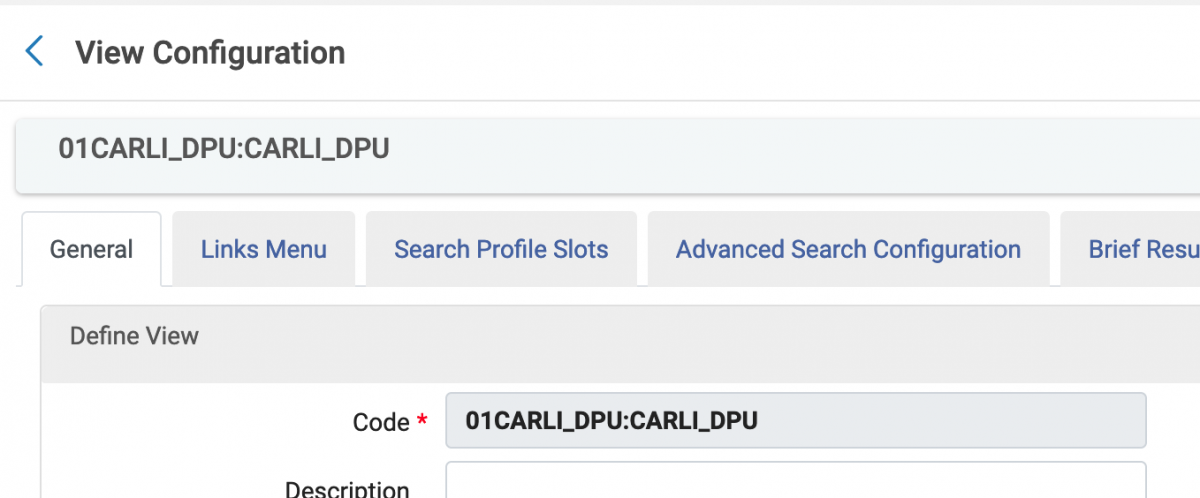
- Zip the entire folder back up into a single .zip file. Make sure that the .zip file name is the same as the Primo VE View Code: 01CARLI_XXX-VIEWCODE.zip (for example, the file name for BHC by default would be named 01CARLI_BHC-CARLI_BHC.zip). You can find this Code field in the General tab of the View Configuration:
- For Windows users, it is recommended that you use a compression tool such as 7zip or Winrar instead of Windows Send to > Compress folder to avoid upload errors.
- For Mac users, use the following procedure to zip and remove any hidden .DS_Store files: In Terminal, navigate to the parent directory of the folder that you want to compress. Then enter the following command to compress the file:
zip –r [target file].zip [my_view] -x "*.DS_Store"
- Upload the edited Customization Package .zip file via the Manage Customization Package tab.
- Changes take effect immediately. Be sure to reload the Primo VE in your browser to view the changes; you may need to clear your browser cache/cookies or you can open a private browser window.
See also theEx Libris documentation on Creating a Customization Package for Primo VE.
Working with the custom1.css and custom.js Files
Each share customization described below requires code be added to one or two of the default files in the Primo VE Customization Package:
- CSS is stored in /VIEWCODE/css/custom1.css
- JavaScript is stored in /VIEWCODE/js/custom.js
The custom1.css can be edited manually and is also customized by Primo Studio. If you used Primo Studio to customize your Primo VE view, the system will likely have inserted a large block of CSS to the custom1.css file starting with the comment /* primary color hook */. Leave anything you find in the file there, and to add new CSS customizations to the custom1.css file, paste the new commented-out description and new active code block into the file above or below any other existing CSS customization code blocks.
The default custom.js file comes with the basic structure necessary for the file function. Do not delete any of the existing text shown in black below, though some customizations like the Primo VE HathiTrust Add-On linked below may require you to EDIT the existing text***. Insert new JavaScript customization in the area indicated in blue below in the custom.js file:
(function () {
    "use strict";
    'use strict';

    var app = angular.module('viewCustom', ['angularLoad']);

    /* INSERT CUSTOM COMMENTS AND JAVASCRIPT CODE BLOCKS HERE */

}) ();
***If you are using more than one Angular module in the custom.js file, include them all in the single "var app" definition in bracket section separated by commas. For example:
var app = angular.module('viewCustom', ['angularLoad', 'hathiTrustAvailability', 'anotherModule']);Shared Customization Code
Hide RefWorks in Primo VE Dropdown Menu - CSS
Show Menu Links on Primo VE Services Pages - CSS
Collapse Get It from the Other Institutions section of the Full Record page - JavaScript - UPDATED 11/7/2022 for Angular 1.8
Primo VE HathiTrust Add-On - CSS and JavaScript
Add a Top Warning Bar to Primo VE - CSS
Add a Custom "Report a Problem" button to the "Send To" Actions - JavaScript
Change Color of Yellow Alert Bar in Primo VE - CSS