How-To: Adding the Kanopy BASE Collection
Last updated: March 5, 2026.
Introduction
Several I-Share libraries have subscribed to the Kanopy BASE ("Bundled Academic Subscription for Education") package of streaming video titles through CARLI. To help libraries manage this content in their Alma institution zones, CARLI has developed an import profile and workflow for libraries to manage collection updates.
Why is this Workflow Needed?
Normally, CARLI would use the Network Zone to manage electronic collections to which many I-Share libraries subscribe. However, the vendor provides institution-specific URLs in MARC records that are not as easy to manage from the Network Zone.
The setup and workflow outlined here will allow members to efficiently manage this electronic collection in their institution zones. This workflow may also be used as a model for other electronic collections, though settings for other collections may differ depending on the source of MARC records and the desired outcomes.
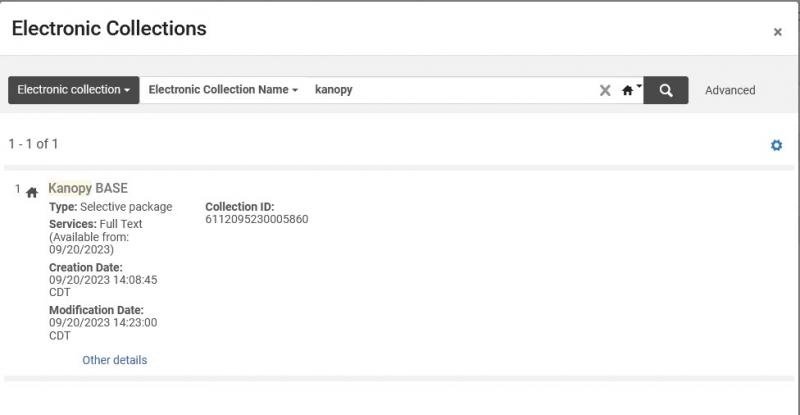
The Alma Community Zone now includes a Kanopy BASE US Collection (Collection ID 61641748650000041) that may be activated from the CZ and configured with the institution's id as a parameter, CUST_ID.
Alma Roles Required
The following roles are required to complete different steps of this process. Different staff at your institution may cooperate on this workflow depending on roles and responsibilities.
- Setup of Electronic Collection: Electronic Inventory Operator
- Copy and Setup of Import Profile: Catalog Administrator or Acquisition Administrator
- Running Import Profile: Catalog Manager, Repository Manager, Catalog Administrator, Repository Administrator
About Kanopy MARC Records
Kanopy MARC records may or may not include OCLC record numbers. As a result, the import profile must rely on different match methods to find matching records in the NZ and to prevent creation of duplicates. Kanopy records all contain a unique record identifier in the MARC 001 field, which matches the title ID number found in the URL. Kanopy records also include a cataloging agency code, CaSfKAN, in the MARC 003 field. On import, Alma concatenates these data into an 035 field that is then used to detect matches elsewhere.
These values will be used in the Match Methods tab below. Use Match Method 035 (Other System Identifier) Match Method for both serial and non-serial methods, then enter the System Identifier Prefix as (CaSfKAN) for each row.
Initial Setup
Institutions will need to create a local collection for their own inventory, and then an import profile that adds or matches bibliographic records to the Network Zone.
Create a Local Collection for Portfolios
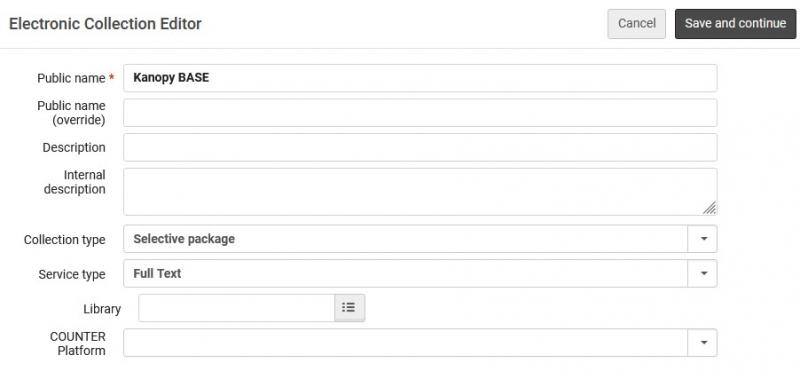
- On the main menu, go to Resources > Create Inventory > Add Local Electronic Collection.
- Enter a Public Name for the collection that will distinguish the contents of the collection for staff. E.g., "Kanopy BASE"
- Select a Collection Type of Selective package, and a Service Type of Full Text.
- Click Save and Continue.
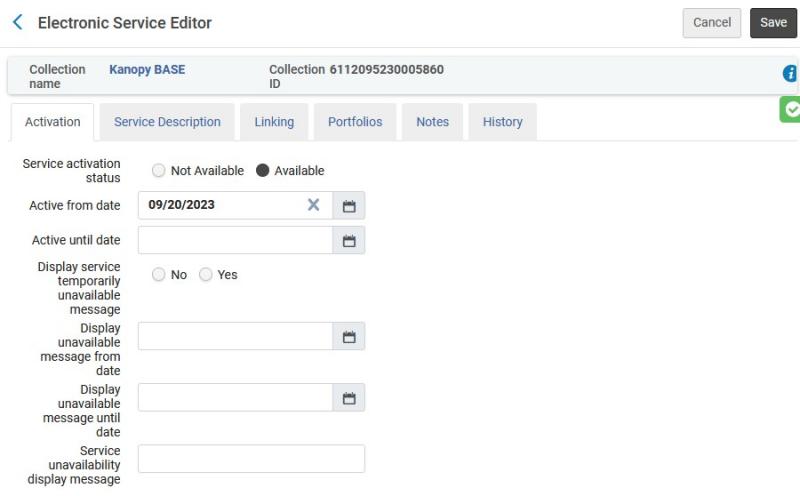
- On the Electronic Service Editor, Activation tab, select an Service Activation Status of Available, and enter an Active from Date.
- Click the Linking tab, for URL type, select Parser Parameters, then enter a Parser of BULK::Bulk. (This is a case-sensitive setting, requiring two colons as well.)
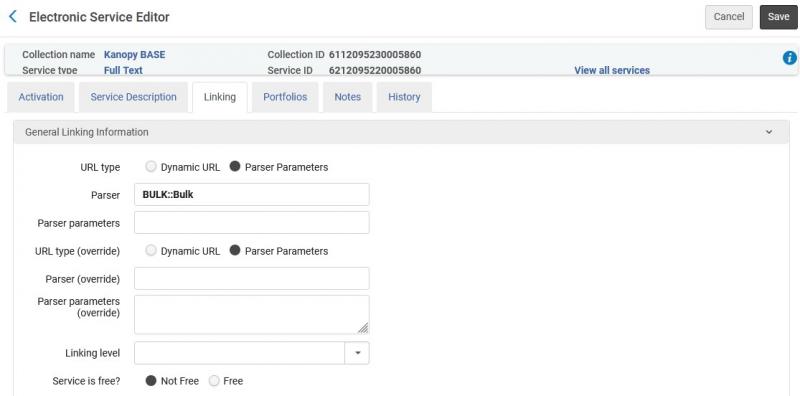
- Click Save. This will save and activate the full text service, and return you to the collection editor.
- Click Save.
Copy and Edit the Network Zone Template Import Profile
CARLI has created a template that contains most of the relevant settings for importing records. Some profile elements must be completed in your IZ before the profile will be available for use. The process starts with copying the template, which opens the import profile for editing.
Note: The profile editor includes a Save Draft button; clicking this button saves your work, sets the import profile status to Inactive, and returns you to the import profiles list.
View the profile as a Word document
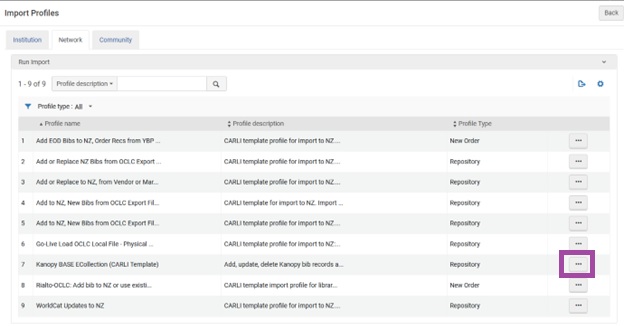
- On the main menu, go to Resources > Import > Manage Import Profiles.
- Click the Network tab.
- Locate the template, Kanopy BASE ECollection (CARLI Template). Click the … menu button, then select Copy.
- On the Profile details tab, select the Originating System of Kanopy, then change the Status of the profile to Active.
- The Profile Details tab should appear like the image below before continuing.
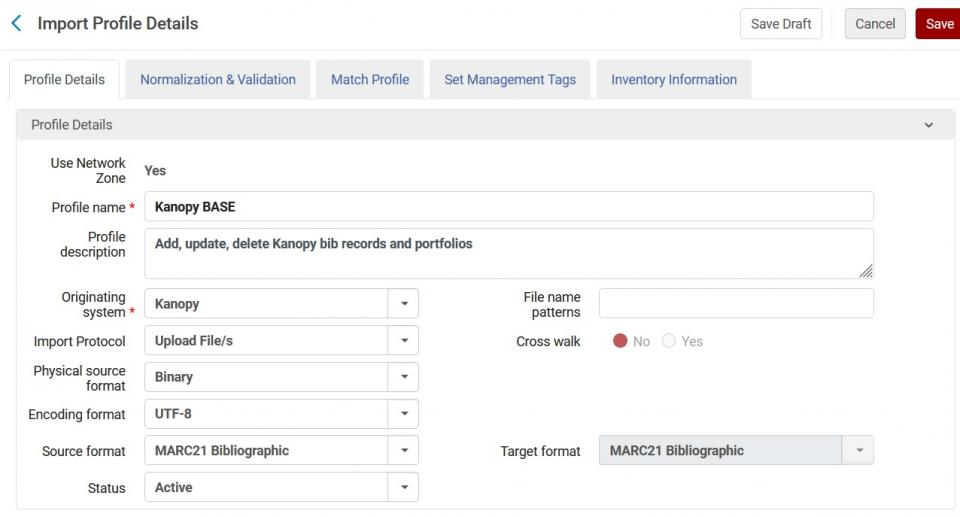
- The Profile Details tab should appear like the image below before continuing.
- Select the Normalization & Validation tab. For Correct the data for matching and cataloging using, select the Move 856 to 956 rule. For Change the data for PO line and inventory using, select the Copy 856 to 956 for Inventory Creation rule.
- The Normalization & Validation tab should appear like the image below before continuing.
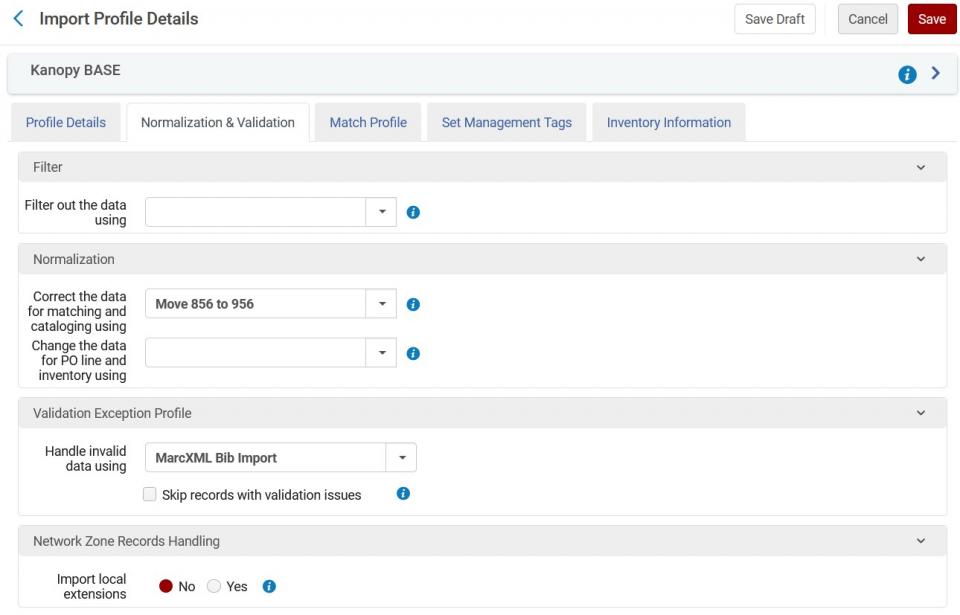
- The Normalization & Validation tab should appear like the image below before continuing.
- Click the Match Profile tab. Enter (CaSfKAN) as the System Identifier Prefix for each match method.
- Important: This information does not get copied from the network template. Make sure this information is added or you may create duplicate bibliographic records in the NZ!
- Set the Community Zone linked records handling to Unlink record from Community Zone and create a local record.
- The Match Profile tab should appear like the image below before you continue.

- The Match Profile tab should appear like the image below before you continue.
- Click the Inventory Information tab, change the Portfolio Type setting to Part of an Electronic Collection.
- Check the box for Delete/deactivate portfolios, and change the Material Type to Streaming Video.
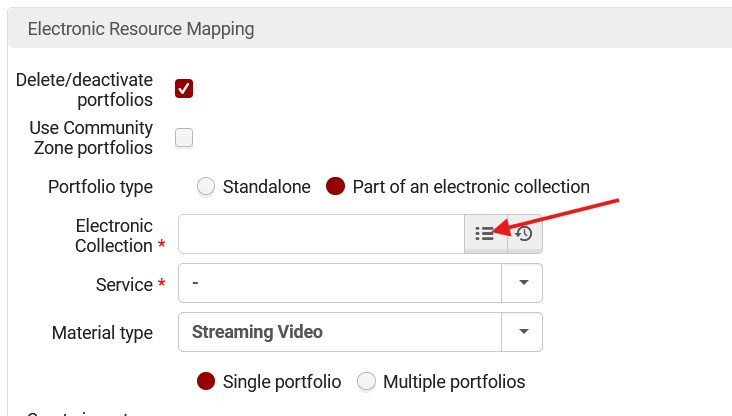
- Click the Electronic Collection hamburger button to search for the collection that you created above. (E.g., "Kanopy BASE") Enter your search in the search box, then click the row from the results to select the correct collection.
- After selecting the collection, you should see the collection name and a Service of Full Text.
- Make sure that the field for Extract access URL from field is 856 with subfield u.
- The Inventory information tab should appear like the image below before you continue.
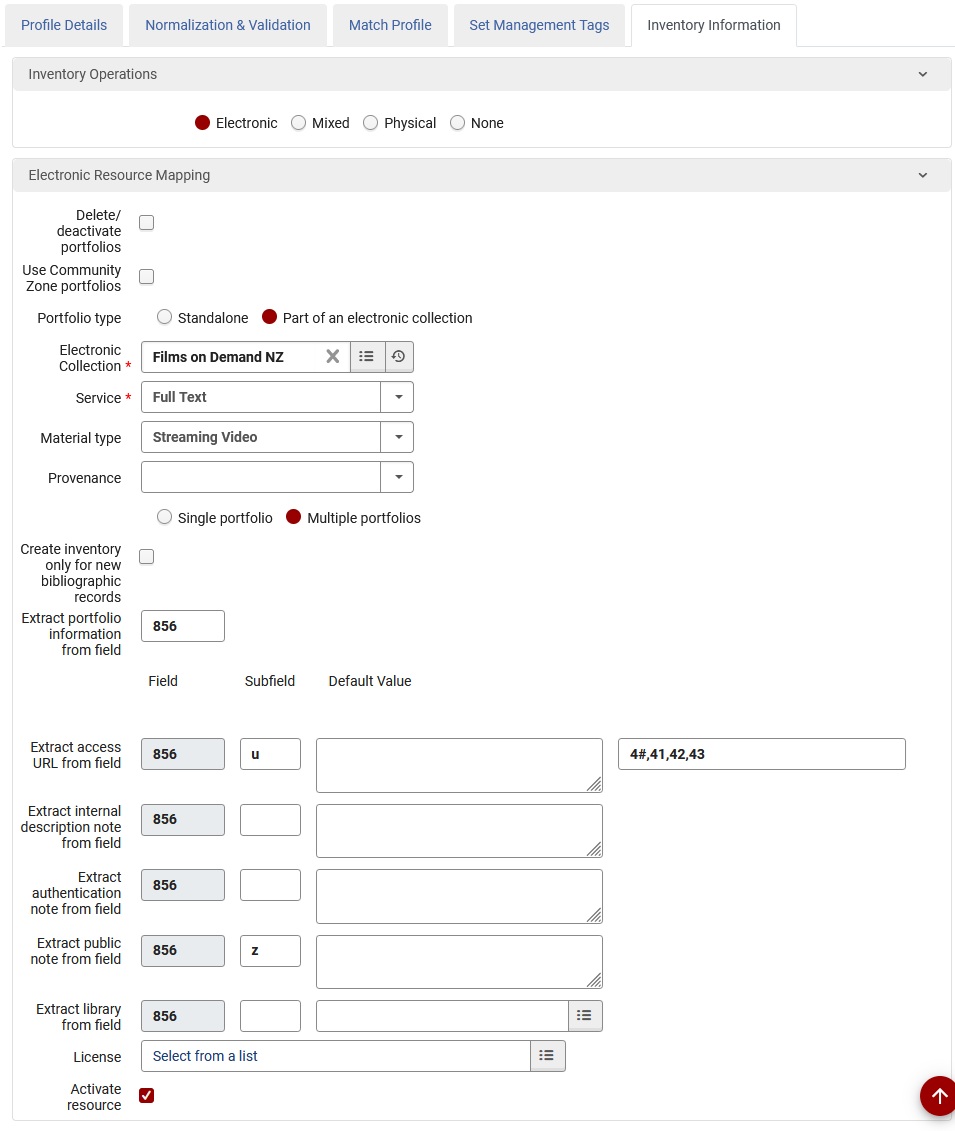
- The Inventory information tab should appear like the image below before you continue.
- Click Save.
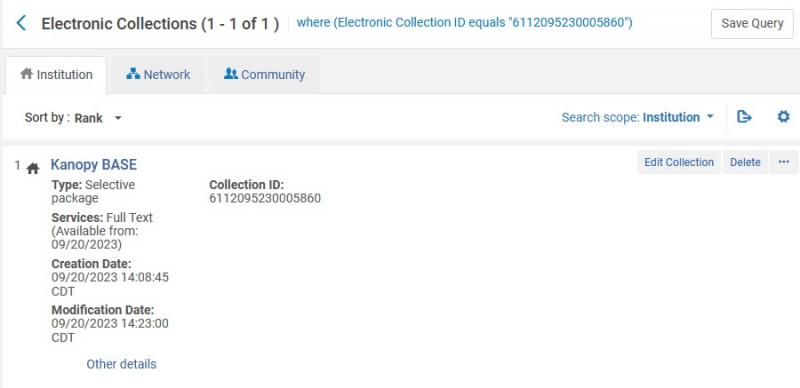
- When back on the import profiles screen, click to the Institution tab. Locate your new import profile, and double check that the status is Active.
Download MARC Records from Kanopy
- Log in to your Kanopy admin account.
- From your Dashboard, select the MARC Records tab.

- Under "Download subscription MARC records" at the bottom of the page, you'll see a list of your active subscriptions.

- Click a subscription name to download all MARC records for Kanopy Base.
- It may take a few minutes to prepare the download of around 9,000 bibliographic records. When the records are ready, click Download file in the popup.
The records should be downloaded in a compressed .zip file. If you plan to review the file in MarcEdit or another tool, you should extract the .mrc files for use.
Run the Import Profile
Perform a test load using the import profile and a small subset of records that you have downloaded, between 5 and 10 records is usually sufficient. MarcEdit provides a function to select some records from a file and extract them to another file.
- On the main menu, go to Resources > Import > Import.
- Locate the Kanopy BASE import profile in the institution tab. Use the filter box to search by Profile Description or Profile Name.
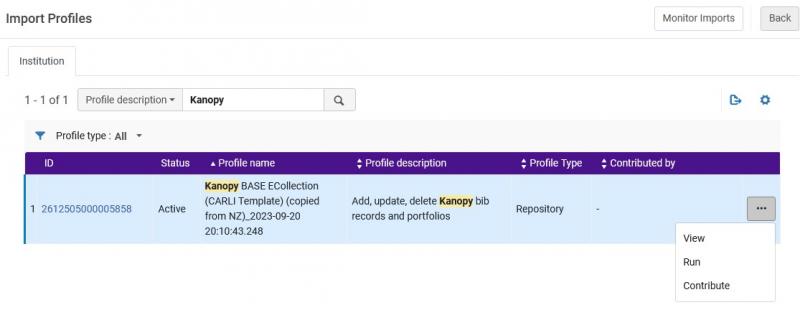
- On the Kanopy BASE row, click the … menu button, then select Run.
- Click Select File, then click the folder button next to File. Browse your computer for the file of test records, and click Open in the browse dialog.
NOTE: By the profile settings, this file should be a "binary" MARC record file. Alma accepts files with a ".mrc" extension. Alma will also accept the MARC records in the ".zip" file as well. Alma will not process a ".mrk" file. - With the file selected, optionally enter a label (to help document what this load contained) and/or notes (e.g., number of records in the load, other details).
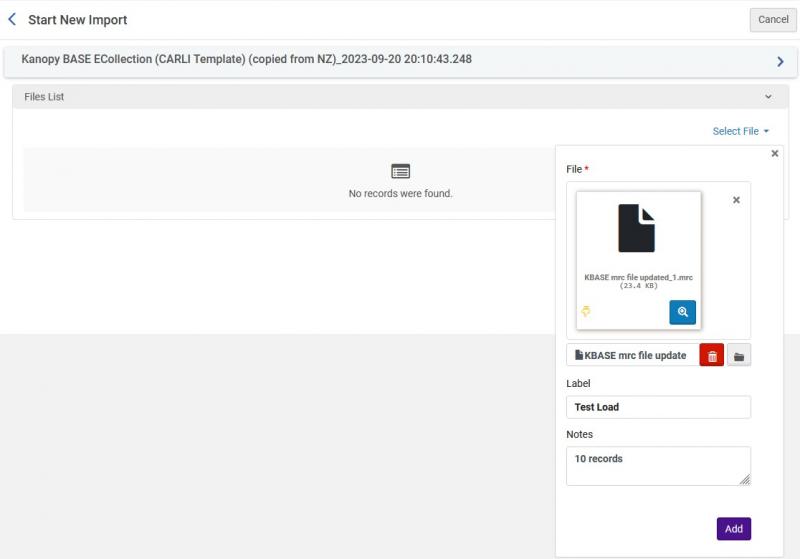
- Click Add. Alma will process the MARC file into one or more MARCXML files.
- On the Start New Import screen, click Submit.
- The import will be queued and then run. Click Refresh to watch the progress. Alma will send an email when the import completes.
- When the job is done, click Refresh, then click the … menu button for the job you ran. Then select Report to view the results.
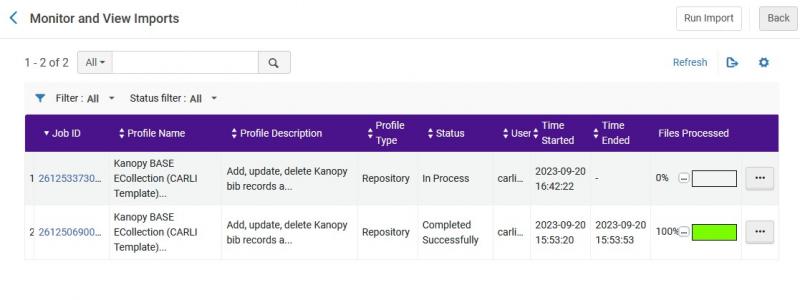
After running the test load, review the reports available from the monitor and view imports screen, and examine the records in Alma and Primo VE searches. If you are satisfied with the outcomes, run the import profile again using the full collection of MARC records.
Ongoing Workflow
A best practice for processing updates of records in collections is to handle deletions first, then handle any additions and updates. The import profile that you have configured includes the ability to handle both deletions and additions.
You may expect that titles in the Kanopy BASE collection will be updated quarterly. On a regular basis, you should connect to the Kanopy MARC records site as documented above, and download sets of records. Ideally, separate deleted titles from new and updated titles, if that's an option available on the site.
The Kanopy import profile will delete records--both the portfolio and the bibliographic record--if the MARC record for a title contains a "d" in position 5 of the MARC record leader. So far, Kanopy downloads for deletions include this setting. It is a good practice to review records in MarcEdit or similar tool to verify that records are set accordingly.
Run the import profile as documented in Run the Import Profile above using the file of deletions. When the import job completes, review the results to check the number of deletions that occurred. It is possible that the deletions file may contain some records that didn't match any records in your IZ; these may be records that might have been added in prior updates that were skipped in the past.
After reviewing the outcome of deletions, run the import profile as documented in Run the Import Profile above a using the file of new and updated records. When the job completes, review the results to check the records added. It is possible that bibliographic records may be skipped, but that the portfolios will be added as expected. Watch out for any records that were not loaded at all. These records may need manual resolution.