Alma Configuration: Add new Library in Alma
updated 10/29/2024
Table of Contents
Directions to add new pick-up/delivery-only Library in Alma
Directions to add new pick-up/delivery-only Library to Alma
In Alma, each Library can have only one circulation desk set as the pick-up location available to patrons in Primo VE. As such, if an institution wants to offer patrons a pick-up location for a non-staffed branch, campus mail, or USPS mail, they will need to add an additional library in Alma to serve that purpose.
Side note: While Alma has built-in "Personal Delivery" functionality, that functionality does not work for I-Share materials (it does work for local materials for local patrons). This is due to how the Linked Users and AFN currently function. As such, many I-Share libraries are not using the Personal Delivery functionality, but, are instead setting up a separate library in Alma to manage delivery-only options.
- An Alma-certified staff user with configuration roles should log into Alma Configuration.
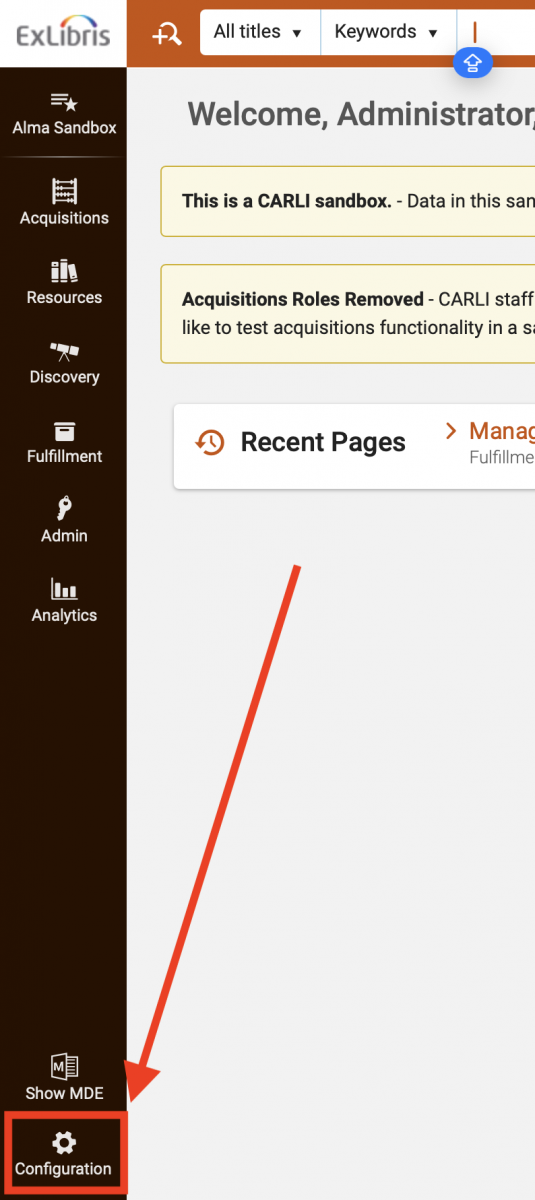
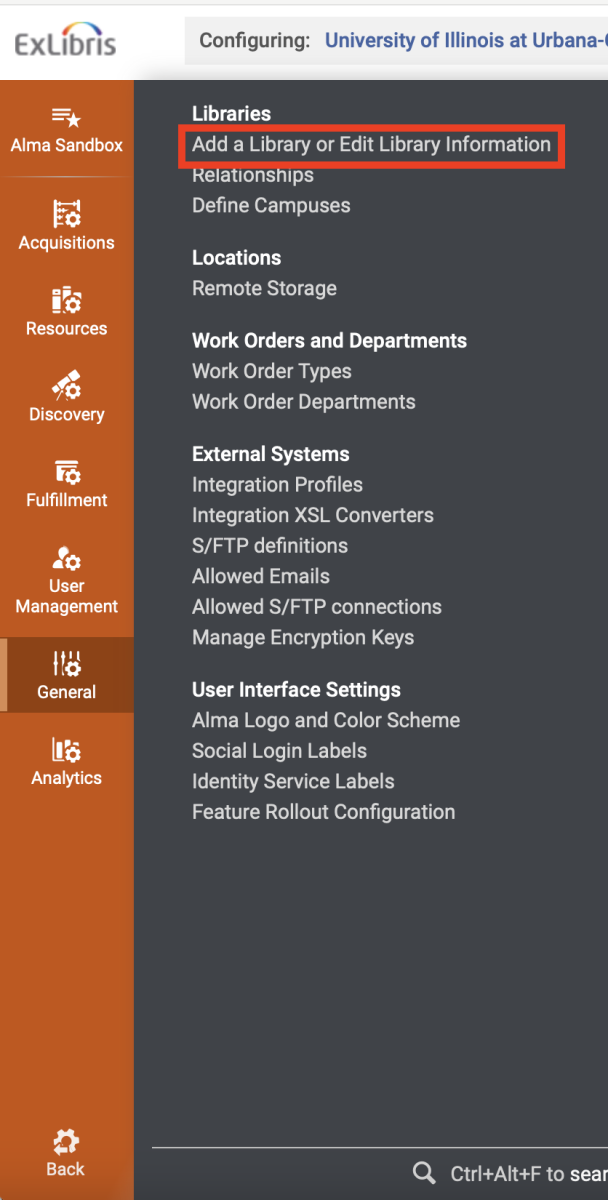
- At the Institutional level, navigate to General> Libraries> Add a Library or Edit Library Information.
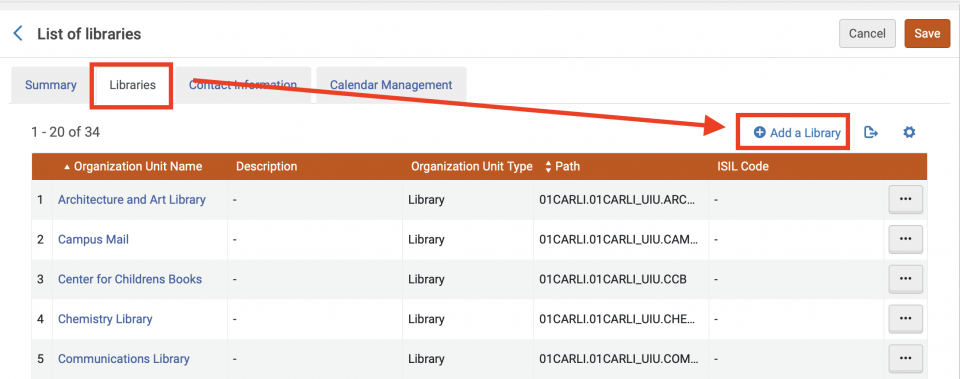
- On the Libraries tab> select "Add a Library."
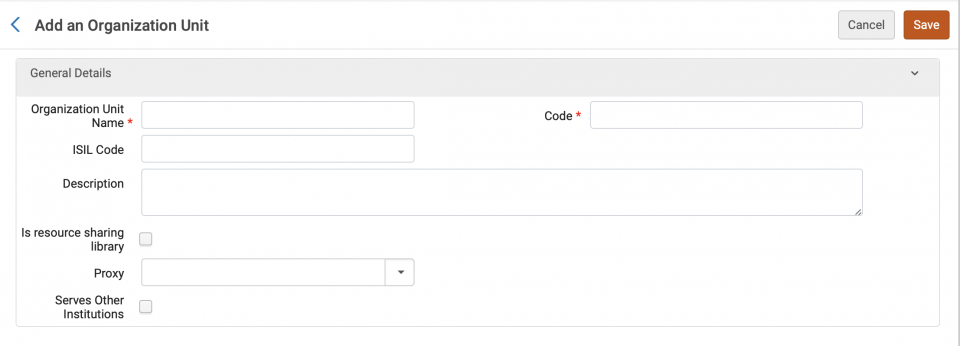
- The "Add an Organization Unit" page will open. Enter details about the new library:
- Organization Unit Name: Enter the name of the library; this can be adjusted later.
- Code: Enter the library's code in ALL CAPS. This cannot be adjusted later.
- Serves Other Institutions: If the library can be used as a pick-up location for I-Share library materials, or for I-Share Library patrons, check this check box.
- Click Save.
- Clicking save will return you to the list of libraries. Click the ellipse button for your newly-added library> Edit.

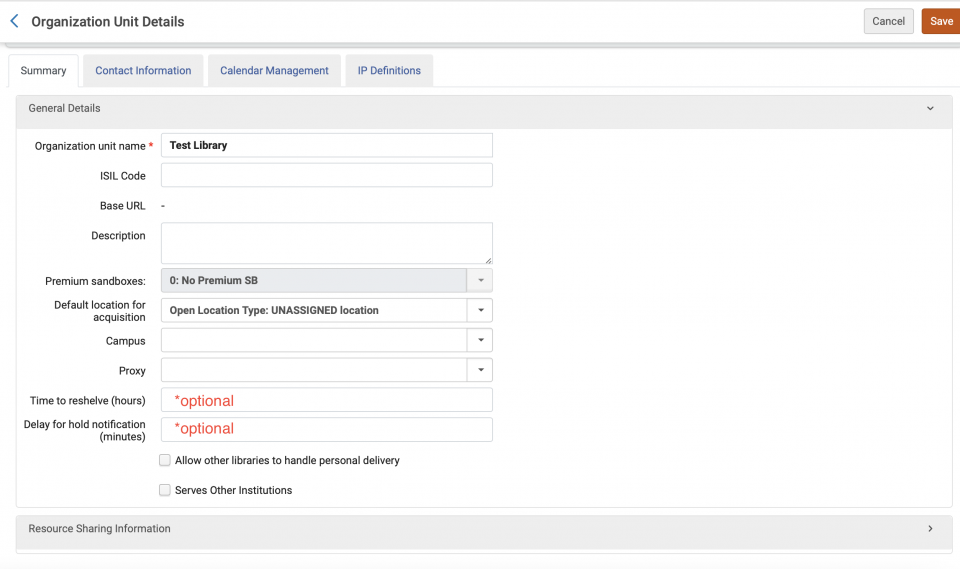
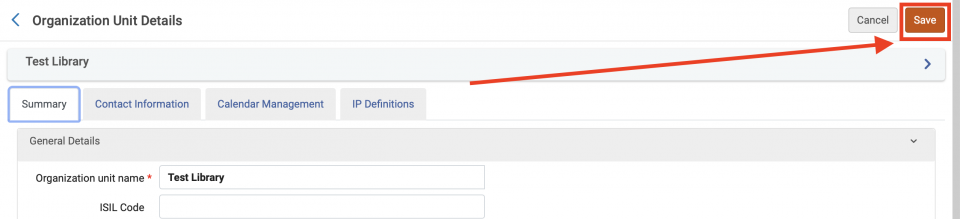
- The "Organization Unit Details" page will open. Enter details about the new library:
- Summary Tab:
- No updates necessary. Optional- you can enter the "Time to reshelve" or "Delay for hold" value.
- No updates necessary. Optional- you can enter the "Time to reshelve" or "Delay for hold" value.
- Contact Information Tab:
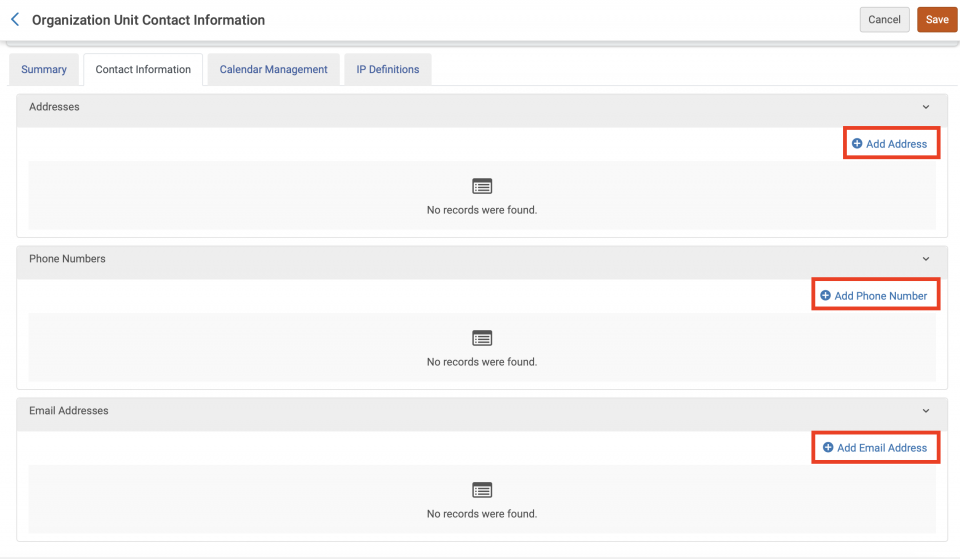
- Enter the library's mailing address.
- Do not select the "Patron Communications" address type.
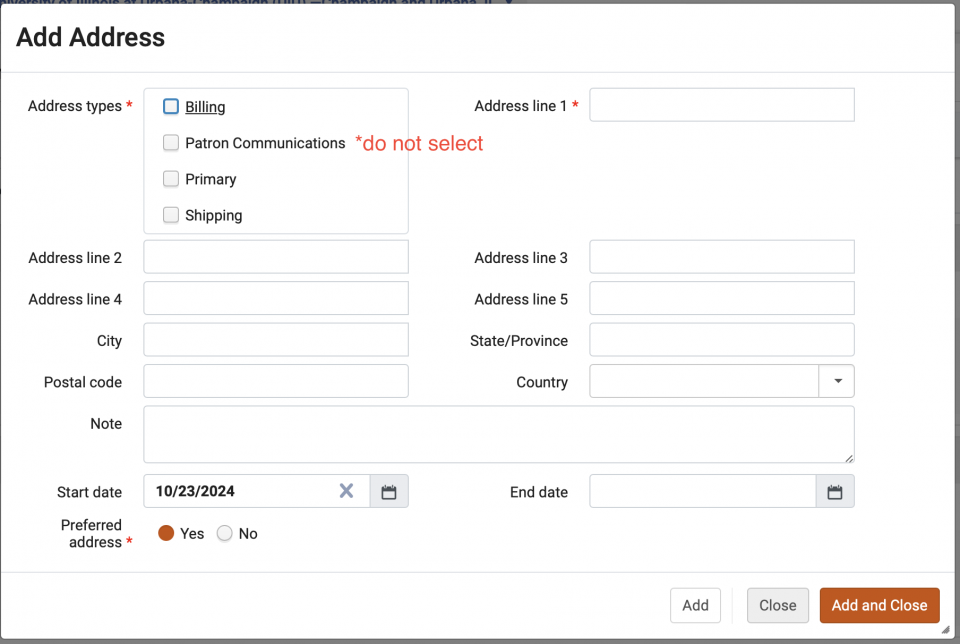
- Do not select the "Patron Communications" address type.
- Enter the library's main phone number.
- Do not select the "Patron Communications" phone type.
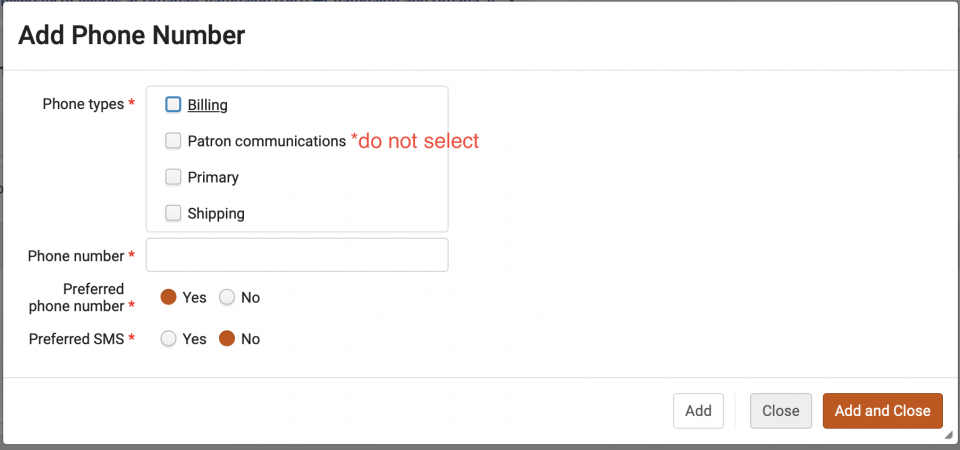
- Do not select the "Patron Communications" phone type.
- Enter a contact email address for the library.
- Do not select the "Patron Communications" email address type.
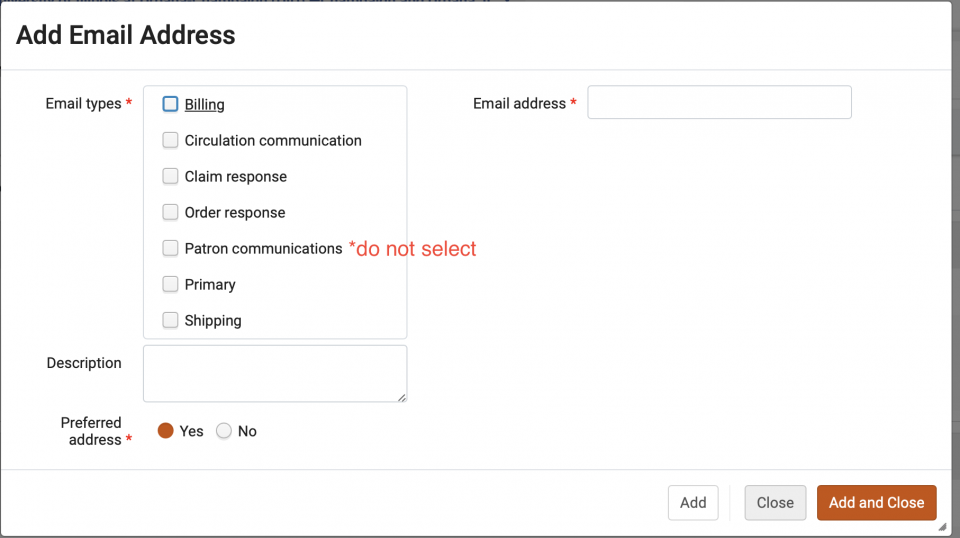
- Do not select the "Patron Communications" email address type.
- Enter the library's mailing address.
- Calendar Management:
- Enter standard operating hours for the library. If the library is a non-staffed branch, these hours can match your main library.
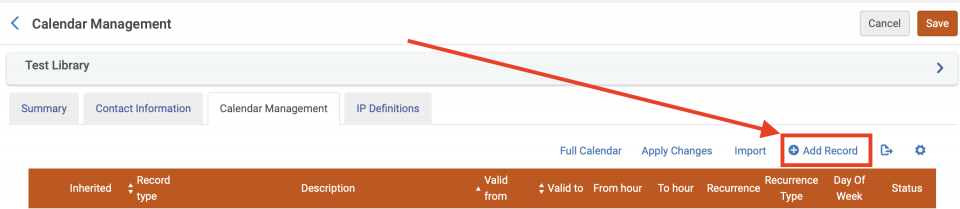
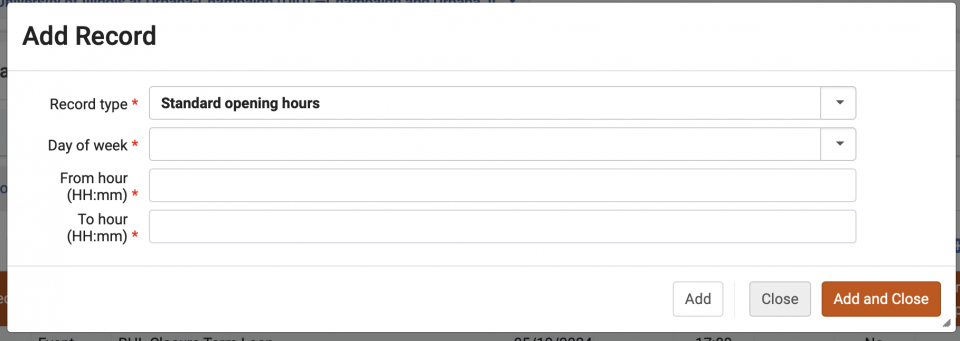
- Enter standard operating hours for the library. If the library is a non-staffed branch, these hours can match your main library.
- IP definitions:
- No updates necessary. Optional- you can enter the IP address range for the library or for the main library.
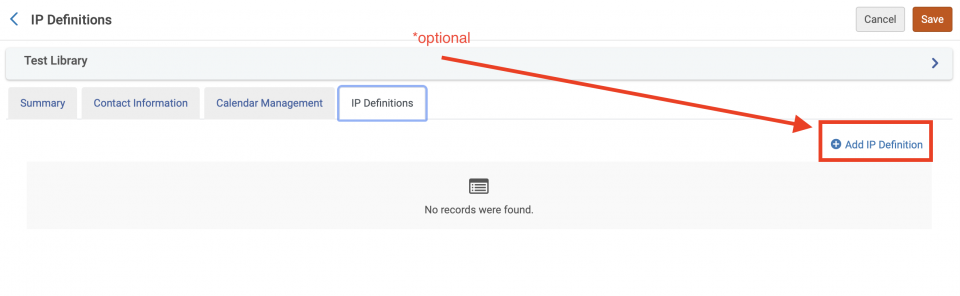
- No updates necessary. Optional- you can enter the IP address range for the library or for the main library.
- Click Save.
- Summary Tab:
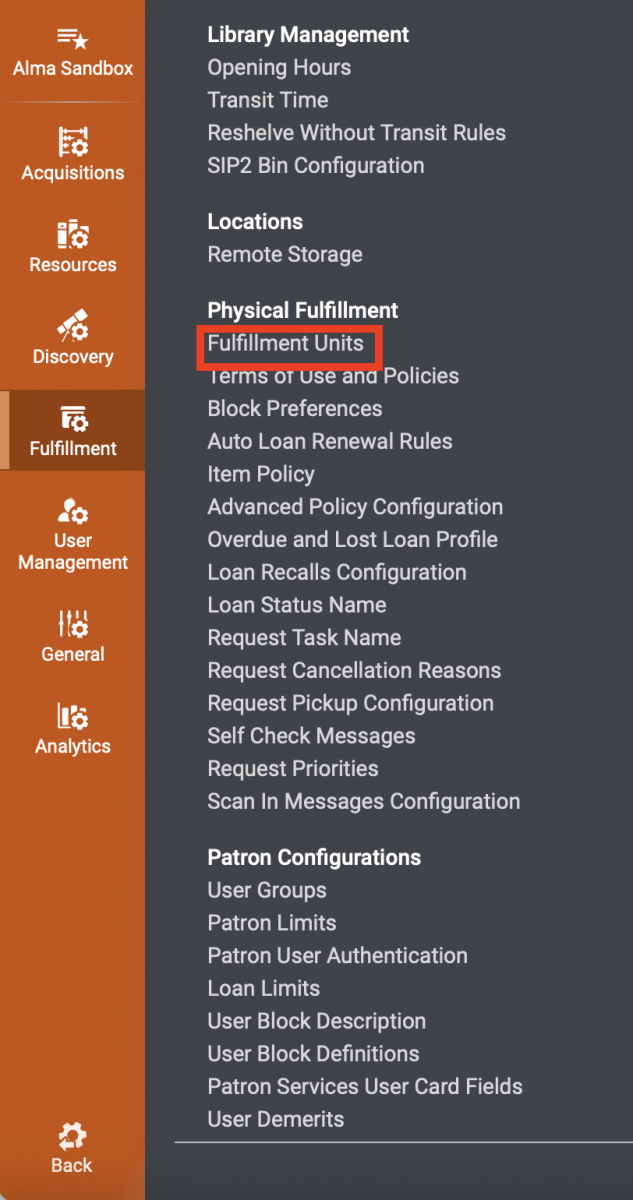
- At the Institutional level, navigate to Fulfillment> Physical Fulfillment> Fulfillment Units.
- Based on your library's policies, select which Fulfillment unit the default location from the new library best fits under. Since this location will not contain materials, select your non-circulating/limited circulating fulfillment unit.
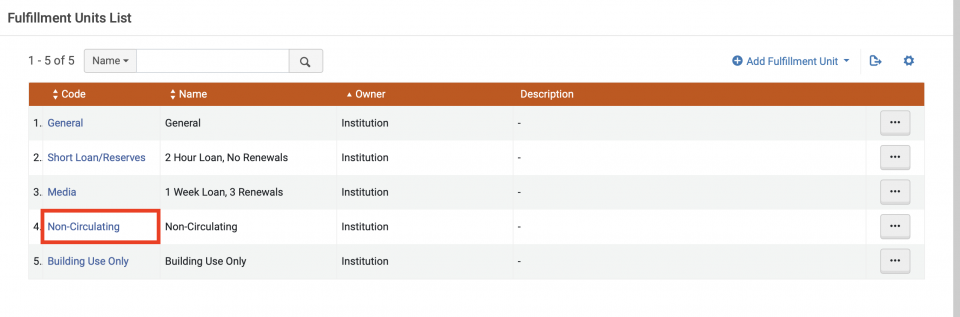
- Select that Fulfillment unit, then on the Fulfillment Unit Locations tab, select "Attach existing location."

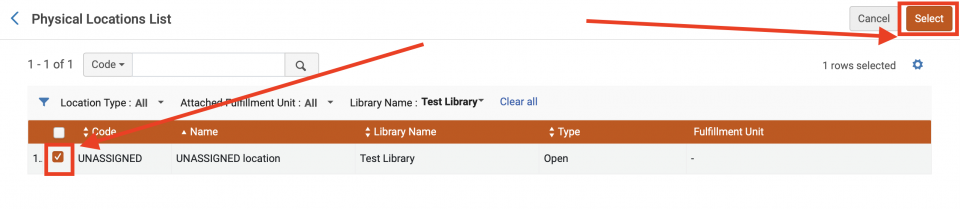
- You can limit the list by the new library's Name. Locate the default location, check the checkbox to pick the location, and then click "Select" to apply the location to the shelving unit.
- Switching to Library-level configuration. For the newly-added library, navigate to Fulfillment> Library Management> Circulation Desks.
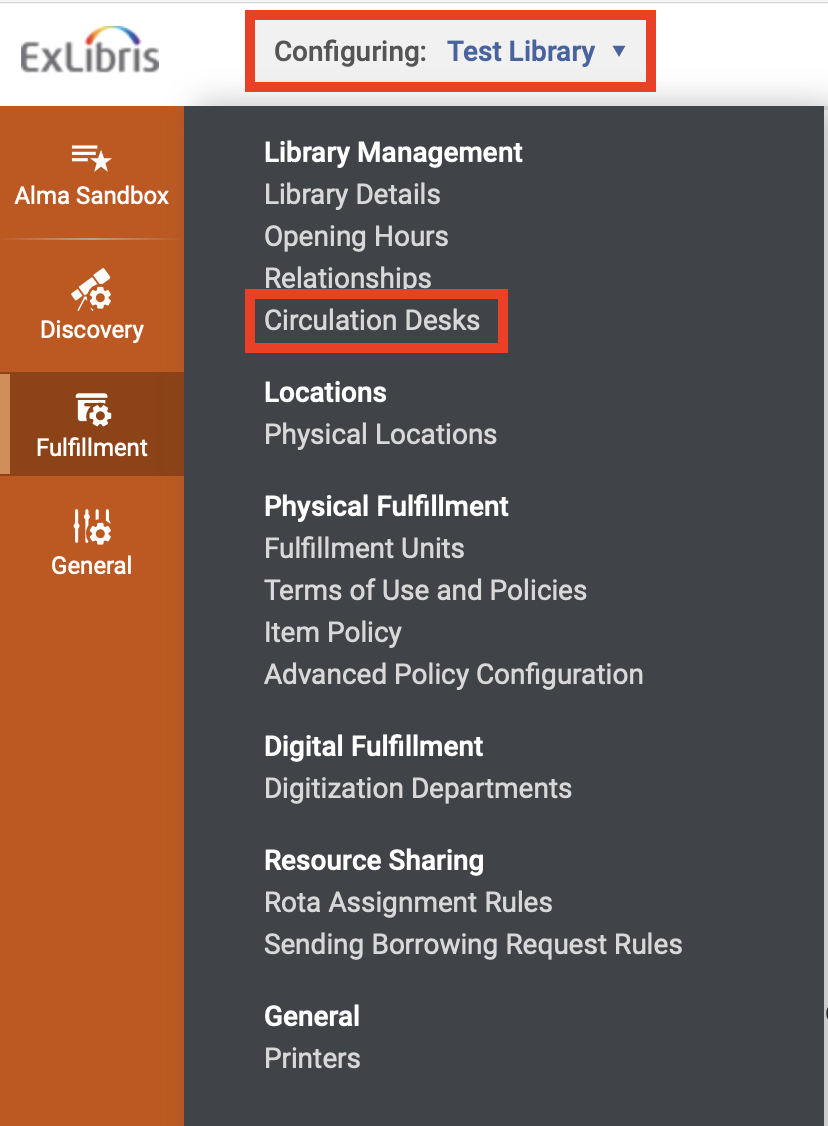
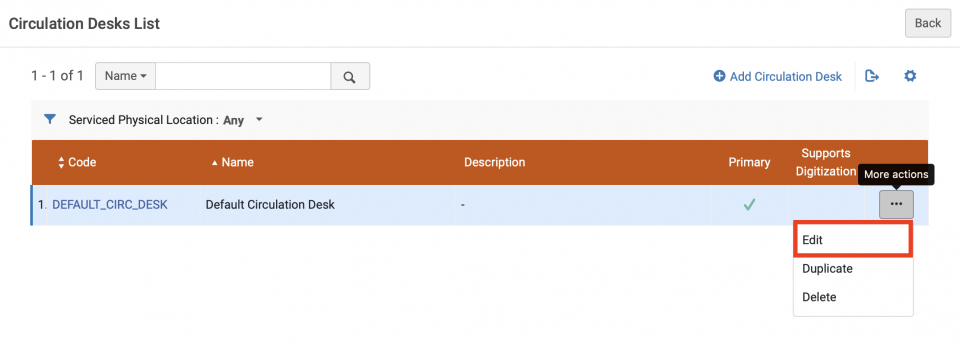
- For the DEFAULT_CIRC_DESK, click the ellipse> Edit. Update details for the new circulation desk.
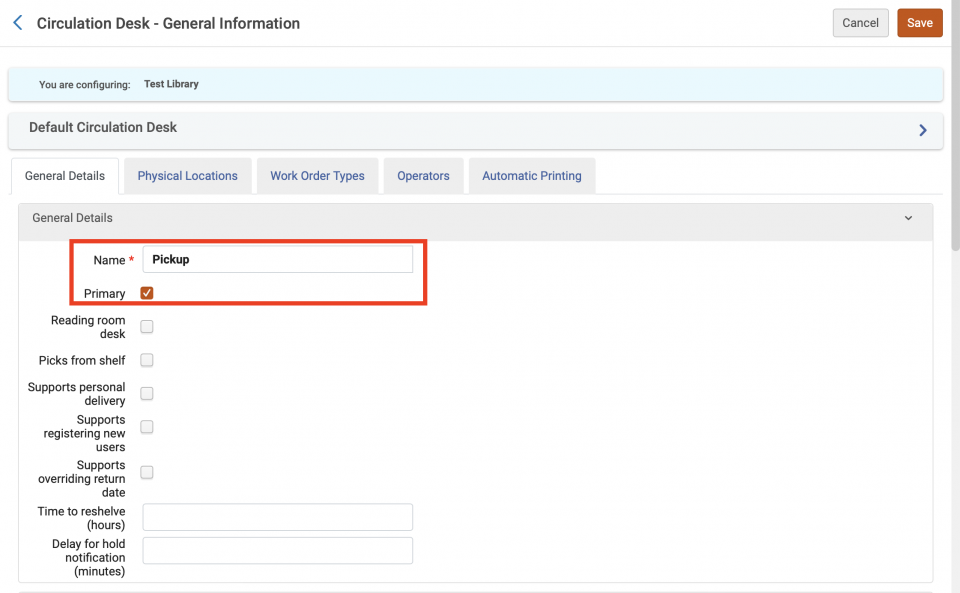
Most details are optional. These should be checked:- General Details:
- Name: Rename the circulation desk to reflect its purpose. The patron will see this name in Primo VE, and staff will see it in Alma.
- Primary: Should be checked
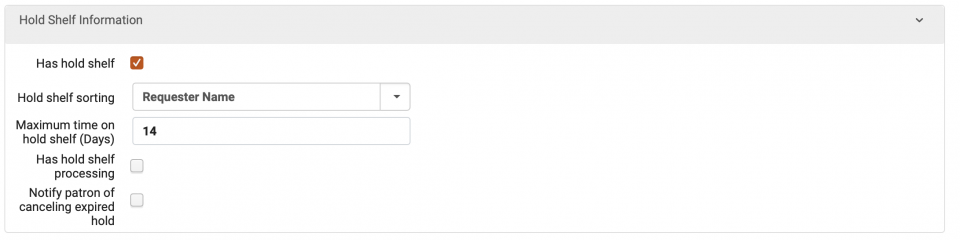
- Hold Shelf Information:
- Has hold shelf: Should be checked
- Maximum time on hold shelf (Days): Should be 14
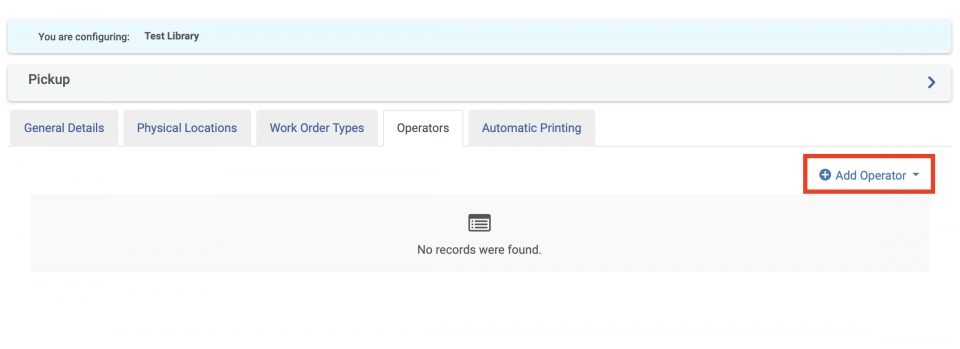
- Operators:
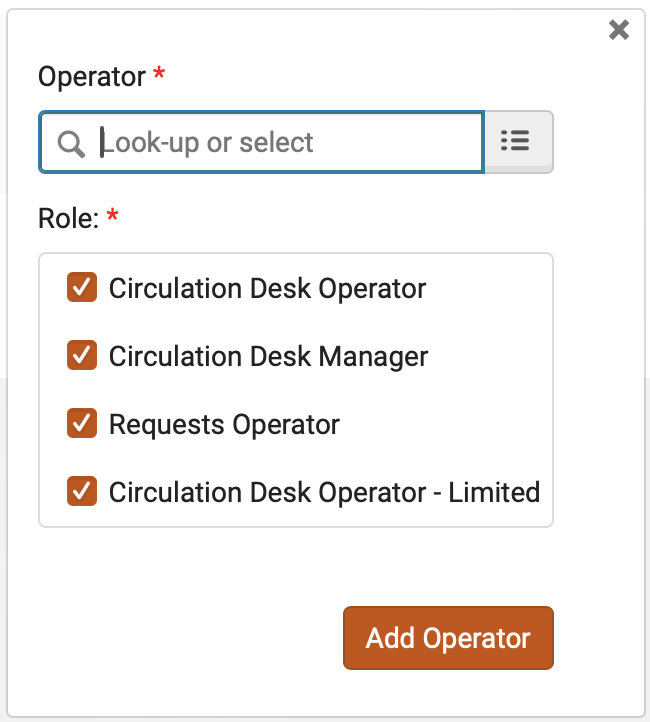
- You can add staff who should have permissions at the new circulation desk using this tab. (The alternative is to search for each staff member individually, and add roles scoped to the circulation desk manually or by profile.)
- Click Add Operator, search for the staff member, then check the boxes for which roles should be applied at this circulation desk, and finalize with the Add Operator button
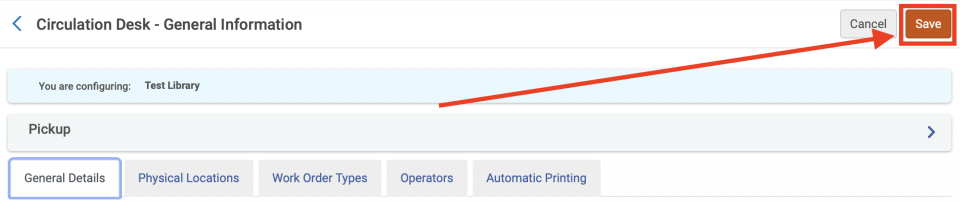
- Click Save after edits are made to the new library.
- General Details:
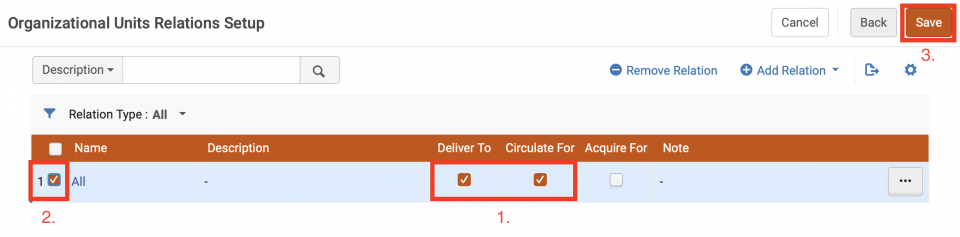
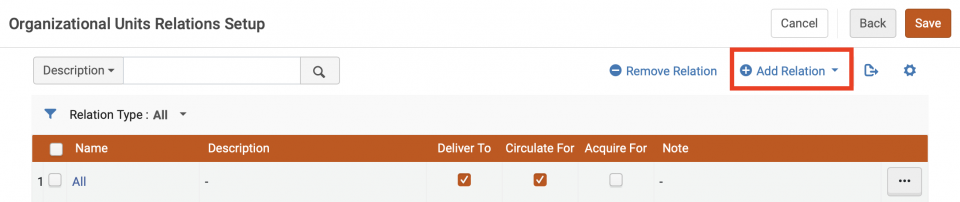
- For each library at your institution (including the newly-added delivery library, and the AFN-related Resource Sharing Library), navigate to Configuration > Fulfillment> Library Management> Relationships.

- If the selected library you are configuring has a deliver to/circulate for relationship with the newly-added library:
- Double-check that the "All" row has both "Deliver To" and "Circulate For" checked.
- Check the checkbox to the left of the "All" row.
- Save the changes.
- If the selected library you are configuring should NOT have a deliver to/circulate for relationship with the newly-added delivery library (such as special collections/archives, etc):
- Select "Add Relation" and pick the newly-added delivery-library library in the Library box.
- Leave the "Services" checkboxes unchecked.
- Add a Note for why the libraries do not have a relationship, and then click "Add Relation."
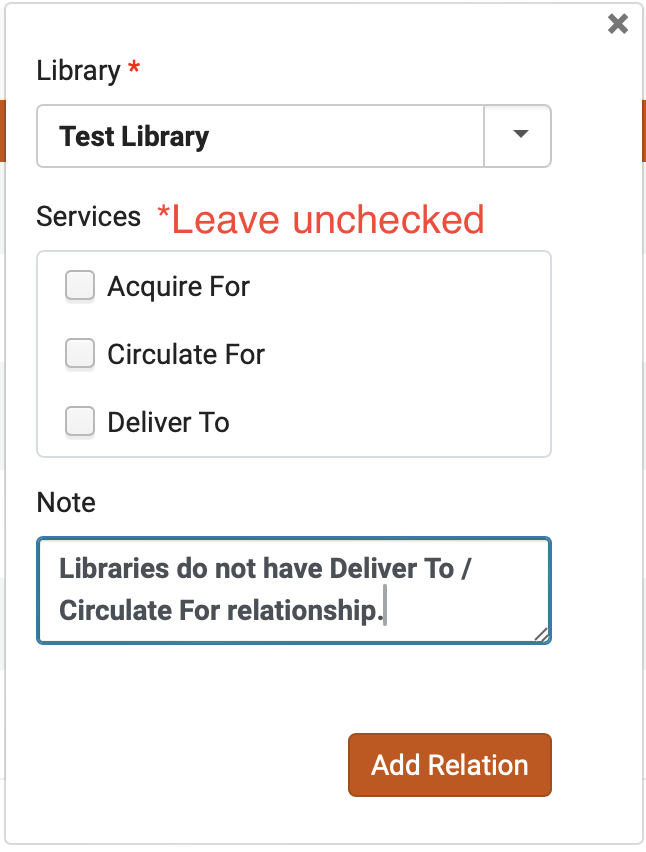
- Review the newly added row, and then click Save.
- Select "Add Relation" and pick the newly-added delivery-library library in the Library box.
- If the selected library you are configuring has a deliver to/circulate for relationship with the newly-added library:
- Configuration in Alma is now complete.
- Double-check that you are offered the newly-added delivery library in Primo VE when logged in as a patron.
- Double-check that you are offered the new pick-up library in Alma work locations (if your user account has permissions at the new library).