Creating a New User Group
Roles Required
To modify Alma configuration for user management, you will need either a User Administrator or a General System Administrator role.
updated 6/12/2025
Part 1: Create a User Group
- Go into Alma Configuration using the gear icon on the lower left of the menu sidebar, or typing Ctrl+Alt+C.
- Go to User Management > User Details > User Groups.
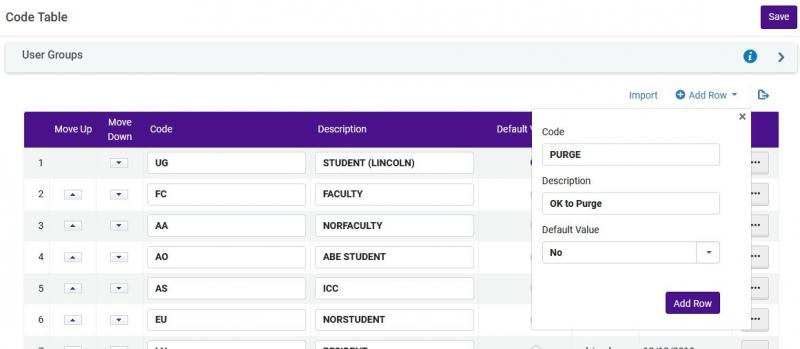
- The user group list is a code table, requiring you to enter a user group code--used primarily in student information system (SIS) loads--and a description that is visible on user screens in Alma. Click Add Row to open a row-entry window.
- Enter the Code for your new user group.
- Enter the Description for your new user group.
- Select No as the Default Value.
- Click Add Row.
- The new row will be added to the bottom of the code table. The table includes buttons to move up and move down different rows, but there is no functional advantage to sorting these rows. Click Save to commit your changes.
You are able to manually change existing rows from this table by clicking in the Code or Description fields. CARLI recommends against changing any Code values that are in use on user records or in historical Analytics data, as changing a code may result in errors to user record data and fulfillment rule processing. Changes to Description values will be visible immediately in Alma and Primo VE.
Rows may be deleted from the code table using the actions menu button [...], and selecting Delete. CARLI recommends against deleting any user group rows that are in use on user records. Deleting rows makes the value unusable but does not remove existing data from a user record.
Part 2: Assign the User Group to a User Record Type
Before a user group may be used, you must make it eligible to be associated with one or more types of user records. Alma supports different user record types: Public, Staff, Contact. Most institutions will only need Public, for users that are imported via SIS loads.
From Alma configuration:
- Go to User Management > User Details > User Record Type/User Group.
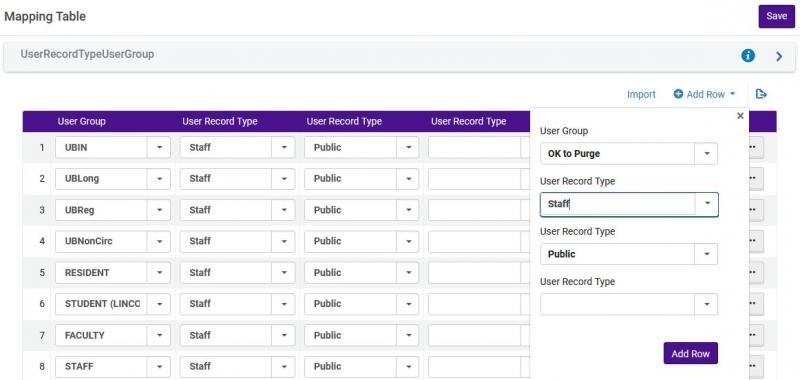
- The user record type-user group list is a code table, requiring you to enter a user group then associate that group with up to three user record types. Click Add Row to open a row-entry window.
- Select the User Group that you created above.
- Select a user record type of Staff.
- Select a user record type of Public.
- Click Add Row.
- The new row will be added to the bottom of the code table. Click Save to commit your changes.
Part 3: Option to Restrict User from I-Share
If the user group that you are creating will not be eligible for I-Share resource sharing, you should list it as a restricted user group. Restricting a user group prevents Alma from creating a linked user in other I-Share institution zones for that particular group. This prevents the user from placing requests and from eligibility to borrow in person at other libraries.
From Alma Configuration:
- Go to User Management > Collaborative Networks > Restricted Users.
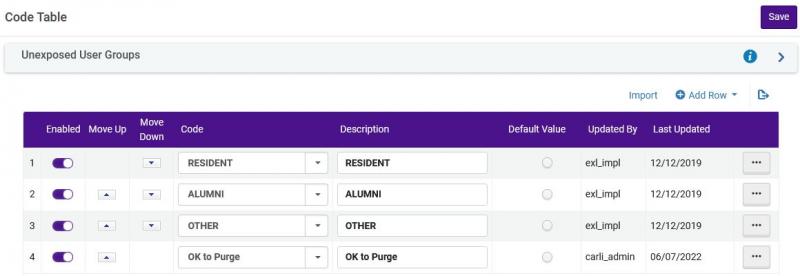
- The unexposed user group list is a code table, requiring you to enter a user group and description. Click Add Row to open a row-entry window.
- Select the User Group that you created above. (While the field label is Code, the drop-down list contains user group descriptions.)
- Enter the corresponding Description, or enter a description of why the group is blocked.
- Select No as a Default Value.
- Click Add Row.
- The new row will be added to the bottom of the code table. Click Save to commit your changes.
Part 4- Review Patron Limits
Your library may have added thresholds for patron activity and/or patron delinquency that is monitored in the Patron Limits table. When a patron surpasses the value for their user group in a field, they are prevented from additional loans at your library, unless staff perform an override.
From Alma configuration:
- Go to Fulfillment > Patron Configurations > Patron Limits.
- The table contains rows for each user group at your institution for which patron limits are defined. All rows are optional except the row for the I-Share user group, which is set consistently across the consortium and should not be edited. Click Add Row to open a row-entry window for your new user group.
- Select the User Group that you created above.
- Enter any maximum thresholds for the user group that meet your library's policies, such as Max. cash, Max. overdues, or Max. overdue recalls.
- Click Add Row.
- The new row will be added to the bottom of the table. Click Save to commit your changes.
Part 5- Review Loan Limits
Your library may have added limits related to the number of loans a patron may have at a given time, for materials from particular locations, item policies, or material types at your library. These setting are optional.
From Alma configuration:
- Go to Fulfillment > Patron Configurations > Loan Limits.
- The table contains rules as defined for the limits applied for combinations of users, item policies, material types, and locations. The rules work in addition to each other, for example, if one rule assigns at TOTAL number of loans to a user group, and another rule assigns a total number of loans of a specific item policy, Alma will make sure that both rules are applied. These rules are also used in conjunction with the fulfillment unit rules described in Part 6 of these directions.
- For example, one rule designates that a Community user can have 5 total loans, but, a second rule designates that anyone can only have 1 digital camera at a time.
- This would allow the community user to have 1 digital camera plus 4 other items from the collection, or, if zero digital cameras are checked out then they can have 5 other items from the collection.
- For example, one rule designates that a Community user can have 5 total loans, but, a second rule designates that anyone can only have 1 digital camera at a time.
The configuration at each I-Share library is different, and thus difficult to document. Contact support@carli.illinois.edu, and we'd be happy to assist with and individualized review.
PART 6- Review Fulfillment Unit
Review both the loan and request rules in the Fulfillment Unit where location is added to see if any rules need adjusted to account for the new user group.
The configuration at each I-Share library is different, and thus difficult to document. Contact support@carli.illinois.edu, and we'd be happy to assist with and individualized review.
Part 7- Review Overdue and Lost Loan Profiles
Review both the overdue and lost loan profiles at your institution to see if any profiles need adjusted to account for the new user group.
The configuration at each I-Share library is different, and thus difficult to document. Contact support@carli.illinois.edu, and we'd be happy to assist with and individualized review.