Overview: Printing Options in Alma
updated 2/27/2024
Overview
According to Ex Libris, "Alma is hosted in a SaaS environment. Due to security concerns and technical limitations, SaaS environments do not support direct connections of local or network printers. Instead, printing in Alma works using email or a printout queue. Printout queue is the preferred option though email printing is still supported. Each library/institution must define the email addresses of its local printers in Alma, which route staff-oriented, Alma-originating e-mails (including request and transit slips) to the appropriate printer. The printing queue method is the preferred method when printing to a physical printer."
With Alma, the words "Printing" and "Printer" can refer to either generating an electronic version, or producing a paper copy, of a letter.
There are 6 primary "printing" options:
- An email-enabled physical-paper-printer, so "printed" letters print directly to paper.
- An email address as a "printer" so "printed" letters are emailed to the account.
- Alma's Quick printing so staff can print to a computer-connected "printer" via a browser immediately; also a copy can be sent to an email account.
- Alma's Quick printing so staff can print to computer-connected "printer" via a browser immediately; also a copy can be sent to an Alma print queue for staff to review as needed/desired.
- A print queue for staff to review and print from as needed/desired.
- A print queue paired with the Alma Print Daemon
Three of these options involve setting up a library email address as a printer; three of the options involve setting up an Alma Printout Queue.
Note: Letters sent to the Printout Queue remain for 30 days before being automatically removed.
No matter which option you choose, it needs to be set up in Alma Configuration.
- Note: Some letters in Alma are NOT intended to be printed to a "printer;" they're designated for email-only. It is not possible to send letters intended for email-only to a printer or print queue (outside of printing the email).
- As examples from Ex Libris:
- It is possible to send the letter "Resource Request Slip Letter" to the "Printout Queue" because this is designed to be printed to a piece of paper.
- It is not possible to print the "Order Claim Letter" to the "Printout Queue" because this is designed to be sent by email to a vendor, and not to paper.
- As examples from Ex Libris:
Adding or editing a printer or print queue in Alma
Printers for institutional-level tasks or institutional-level service units (such as acquisitions, cataloging, or work order departments) are added at the institutional level.
Printers for fulfillment/circulation tasks or for library-level service units are added at the library level.
The same "printer" can be added at both levels as needed.
To configure printers, you must have one of the following roles:
- General System Administrator
- Fulfillment Administrator
Documentation from Ex Libris
Adding a Printer
Setting up a new printer in Alma
Configuring Institutional Level Printers
- In Alma Configuration at the institutional level, select the Fulfillment area.
- Under the "General" section, select Printers.
- A list of the printers at the institutional level will display, if some are set up.
- To edit an existing printer, select the ellipse for the printer row, and choose "Edit."
- To add a new printer, select the "Add Printer" option above the printer list table. After you add a new printer, you then need to edit it to complete setup.
- The settings you chose when editing the printer will depend on which of the 6 printing methods you select.
Each method description on this page will include the proper set up for the printer.- These options include:
- Does this printer need an email address to function as expected?
- Is this printer actually a Printout Queue?
- Each institutional-level printer will likely be associated with one or more service units.
- Completing the "Attach Service Unit" setup for the service unit will make it possible for staff working in those units to select the printer; the "Attach" menu will only include desks/units at the institutional level.
- These options include:
Configuring Library Level Printers
- In Alma Configuration at the library level (for each library at your institution, as needed; the Resource Sharing Library does NOT need a printer set up for AFN), select the Fulfillment area.
- Under the "General" section, select Printers.
- A list of the printers at the library level will display, if some are set up.
- To edit an existing printer, select the ellipse for the printer row, and choose "Edit."
- To add a new printer, select the "Add Printer" option above the printer list table. After you add a new printer, you then need to edit it to complete setup.
- The settings you chose when editing the printer, will depend on which of the 6 printing methods you select.
Each method description on this page will include the proper set up for the printer.- These options include:
- Does this printer need an email address to function as expected?
- Is this printer actually a Printout Queue?
- Each library-level printer will likely be associated with one or more circulation desks or service units.
- For library-level printers, note the "Served Circulation Desks List" and the "Served Service Units List" sections in configuration.
- For each, select to "Attach" the circ desk(s) or unit(s) that should have access to the printer; the "Attach" menu will only include desks/units within the library.
- These options include:
Printing Options: Description and Printer Configuration Settings
There are 6 primary "printing" options; each is outlined below in detail for how to select the options for the printer (see the steps above under "Adding or editing a printer or print queue in Alma" for those directions).
Documentation from Ex Libris
Printouts Queue
Alma Print Daemon
An email-enabled physical-paper-printer, so "printed" letters print directly to paper.
- What this option does:
- If your institution/library's paper printer is email-enabled, and you'd like Alma to print directly to that paper printer automatically without staff needing to approve/release each printout/letter, this method would work for you.
- Printer setting selection:
- Email address: The email address should be entered. Use the email address for the printer provided by your IT department.
- Printout Queue: If you would like the opportunity to review and reprint all letters sent to the printer, you may wish to enable this printer also as a Printouts Queue.
An email address as a "printer" so "printed" letters are emailed to the account.
- What this option does:
- If your institution/library would prefer to have all Alma letters sent to a staff-shared email address, so that library staff can either forward the letters along via email, or print them to a paper printer attached (via network or cable) to the computer where the email is checked, this method would work for you.
- Printer setting selection:
- Email address: An email address should be entered. Use the email address for the email account that should receive the letters when this "printer" is selected.
- Your library may choose to use your shared library email address (circdesk@library.edu) and use email rules to flag or filter the messages from Alma from patron-submitted messages.
- Or, you could ask your IT department for a new email address to collate all of the emailed letters, so that they are kept separate from patron-submitted messages, and the access permissions for the "printer" can be different from your shared library email address.
- Printout Queue: The printout queue is probably not needed, as all printouts are already being received/queued in the email inbox before being printed. However, there is no harm in also setting this printer up as a Printouts Queue.
- Email address: An email address should be entered. Use the email address for the email account that should receive the letters when this "printer" is selected.
Alma's Quick printing so staff can print to a computer-connected "printer" via a browser immediately; also a copy can be sent to an email account.
- What this option does:
- If your institution/library would like to provide staff with the option to print to a paper printer attached (via network or cable) at the time of the transaction using the internet browser's functionality, AND would also like to receive a "backup" copy to a staff-shared email address for later re-printing or forwarding electronically, this method would work for you. Staff would enable "quick printing" upon login.
- Printer setting selection:
- Email address: An email address should be entered. Use the email address for the email account that should receive the letters when this "printer" is selected.
- Your library may choose to use your shared library email address (circdesk@library.edu) and use email rules to flag or filter the messages from Alma from patron-submitted messages.
- Or, you could ask your IT department for a new email address to collate all of the emailed letters, so that they are kept separate from patron-submitted messages, and the access permissions for the "printer" can be different from your shared library email address.
- Printout Queue: The printout queue is probably not needed as a second copy of Quick Printed documents are already being received/queued in the email inbox before being printed. There is no harm in also setting this printer up as a Printouts Queue, except that you then have 3 copies of each letter.
- Email address: An email address should be entered. Use the email address for the email account that should receive the letters when this "printer" is selected.
Alma's Quick printing so staff can print to computer-connected "printer" via a browser immediately; also a copy can be sent to an Alma print queue for staff to review as needed/desired.
- What this option does:
- If your institution/library would like to provide staff with the option to print to a paper printer attached (via network or cable) at the time of the transaction using the internet browser's functionality through quick printing, AND would also like to review and reprint all letters printed via quick printing, you can enable the printer as a Printouts Queue with no associated email address. Staff would enable "quick printing" upon login.
- Printer setting selection:
- Email address: The email address field should be left blank.
- Printout Queue: Enable the printer as a Printouts Queue.
A print queue for staff to review and print from as needed/desired.
- What this option does:
- If your institution/library would also like to queue all letters for preview before printing, you can enable the printer as a Printouts Queue with no associated email address. Staff would also not enable "quick printing" upon login.
- Printer setting selection:
- Email address: The email address field should be left blank.
- Printout Queue: Enable the printer as a Printouts Queue.
A print queue paired with the Alma Print Daemon
- What this option does:
- The Alma Print Daemon allows the library/institution to automatically print to a defined a printer those letters which have been sent to the Printouts Queue. Staff would also not enable "quick printing" upon login. This option provides the functionality of having an email-enabled paper-printer, for non-email-enabled printers.
- Printer setting selection:
- Email address: The email address field should be left blank.
- Printout Queue: Enable the printer as a Printouts Queue.
- Additional setup of the Alma Print Daemon is needed to complete configuration.
Alma-side Printing
Quick Printing Settings
If your library/institution's printing method involves Alma's Quick Printing, each staff member will need to "Enable Quick Printing" to use the functionality.
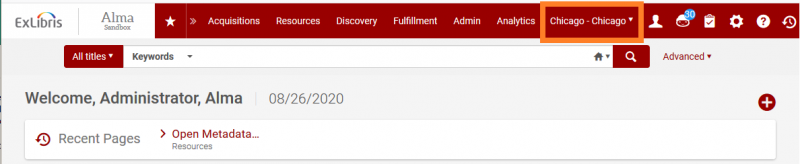
- After logging into Alma, locate the current location setting. The setting is located to the left of the profile icon used for logout.
- It will either look like a map pointer:

- or, will show the name of the library/service unit:
- It will either look like a map pointer:
- Select the location/location indicator. A menu should open with the option to "Enable quick printing."
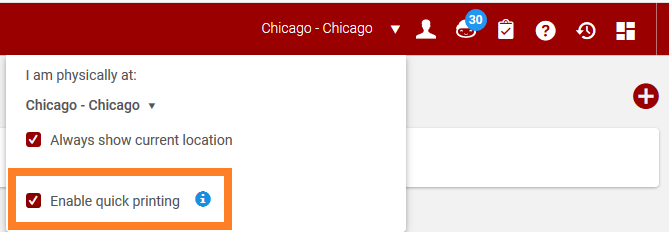
- Make sure that "Enable quick printing" is checked for staff who should use quick printing; and disabled for those who should not.
Print Queue Settings
If your library/institution's printing method involves a Printouts Queue, review the Printouts Queue documentation.
- Double-check that staff who will access the Printouts queue to review/release printouts have one of the following user roles assigned:
- Printout Queue Manager
- Printout Queue Operator
- After logging into Alma, locate the current location setting. The setting is located to the left of the profile icon used for logout.
- It will either look like a map pointer:
- or, will show the name of the library/service unit:
- It will either look like a map pointer:
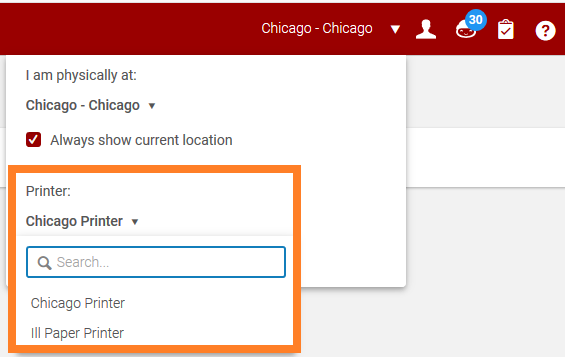
- Select the location/location indicator; a menu will open. If the location has more than one printer option, staff should select the appropriate printer/print queue from the drop-down list.
- To review and/or release a letter from the Printouts Queue to a paper-printer, the queue is found in Admin > Printing > Printout Queue.
- From the queue, you can preview, print using the browser functionality, or cancel a print job.