How To: Processing Patron Digitization Requests in Alma
Processing digitization involves the following steps:
- The patron requests the item.
- You approve the request.
- You pick the item from the shelf.
- You scan the item into the digitization department.
- You digitize the item.
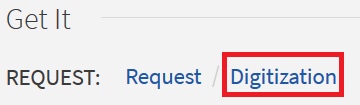
Step 1: Patron Requests Item
If an item is requestable for digitization, a link displays in the GetIt section for the item in Primo:
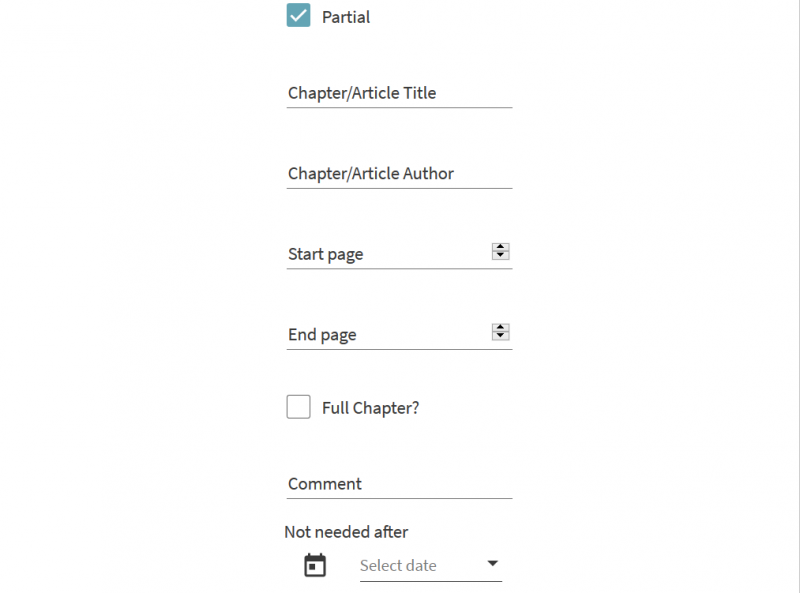
When a patron selects that link, they can fill out a form with the information about the request:
Step 2: Approving Digitization
Once a digitization request has been placed, you need to approve the request if approval was required in the digitization settings. You need the Fulfillment Service Manager role to approve digitization.
To approve the request:
- Select Fulfillment> Approval Requests list.
A list of the requests awaiting approval opens.
- Select the ellipsis> Work On.
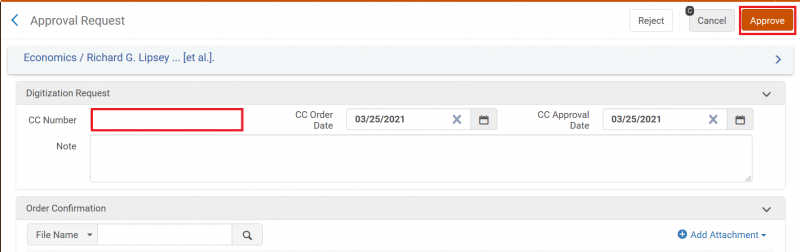
- Enter any copyright clearance information and select Approve.
- Choose the reason for the approval and select Submit.

Step 3: Picking the Item from the Shelf
The next step is to find the item on the Pick from Shelf list and retrieve the item:
- Verify that you are in the Alma location that holds the item.
- Select Fulfillment> Pick from Shelf.
- Select the item and Print Slip.
- Retrieve the item.
- Transit the item to the area where digitization will take place.
Step 4: Scanning the Item in at the Digitization Department
To scan in the item, you will need the role of Work Order Operator. If you have a separate digitization department, after the item arrives at the Digitization Department, scan the item in:
- Verify that your location is at the Digitization Department.
- Select Fulfillment> Scan In Items.
- In the Work Order Type field, select Patron digitization request.
- Scan the barcode.
- Click OK next to the barcode.
The item is added to the list of items to digitize.
If you perform digitization at your circulation desk, after the item has arrived at the desk, scan the item in:
- Verify that your location is at the circulation desk.
- Select Fulfillment> Scan In Items.
- Do not select Patron digitization request.
- Scan the barcode.
- Click OK next to the barcode.
Step 5: Perform the Digitization
To perform the digitization, you will need the role of Work Order Operator.
- Select Manage In Process Items.
- Select Digitization Department.
- Find the item in the list.
- Digitize the item.
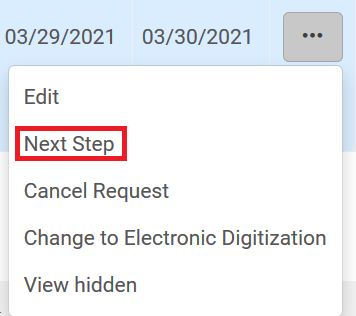
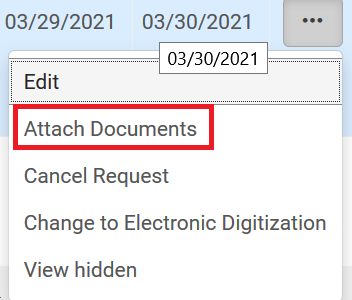
- Select ellipsis> Next Step.
- Select ellipsis> Attach Documents.
- Select Add Attachment.
- Either select a file to upload or enter the URL for the file. Select Add Attachment.
- Select Refresh to see the status of the upload.
- Select Save.
- Select Done.
- Select Scan in Items.
- Select:
- If you have a separate digitization department, Work Order Type: Patron Digitization Request. If you process digitization items at the circulation desk, leave this field blank.
- Done as Yes
- Scan the item barcode
- Select OK.
The item’s destination changes to Reshelve to Stacks.